 how-to
How to Fix Drafty Window Frames in Winter
Table of Contents
- Find the Air Leaks Before You Fix Anything
- Fixes for Drafty Window Frames: Match the Repair to the Gap
- Window Caulking for Drafts: Sealing Stationary Joints
- How to Weatherstrip a Window That Opens
- Temporary Window Insulation Film and Other Winter Fixes
- Repair or Replace? When a Drafty Window Frame Needs a Pro
- Frequently Asked Questions
Last Updated: October 9, 2026
Find the Air Leaks Before You Fix Anything
You can fix drafty window frames in winter without guessing where the cold air comes from: test first, then seal.
Drafty window frames are loose or worn frames that let outside air push into your home. The gap is often smaller than a coin, so you need a test, not just a visual check.
Below, we show you how to find the leak, then match the repair to the gap, using items you likely own.
The Incense and Flashlight Test
The incense and flashlight test is a two-part check that shows where air moves through a window. Run it on a windy day.
Here is how to find air leaks around windows:
- Close the window and lock it.
- Hold a lit incense stick near the frame. Watch the smoke.
- Move the stick along the trim, sash, and sill.
- Note any spot where the smoke bends or blows.
- At night, have a helper stand outside with a flashlight.
- Look for light coming through the same spots.
Smoke that pulls toward a gap means air is moving through it; light from outside confirms the spot. Mark each leak with tape so you can fix them one by one.
Fixes for Drafty Window Frames: Match the Repair to the Gap
The right fix depends on one thing: does the gap move? Stationary gaps get caulk. Moving joints get weatherstripping. Get that match wrong and the seal fails within weeks.
Frame Gaps and Window Trim
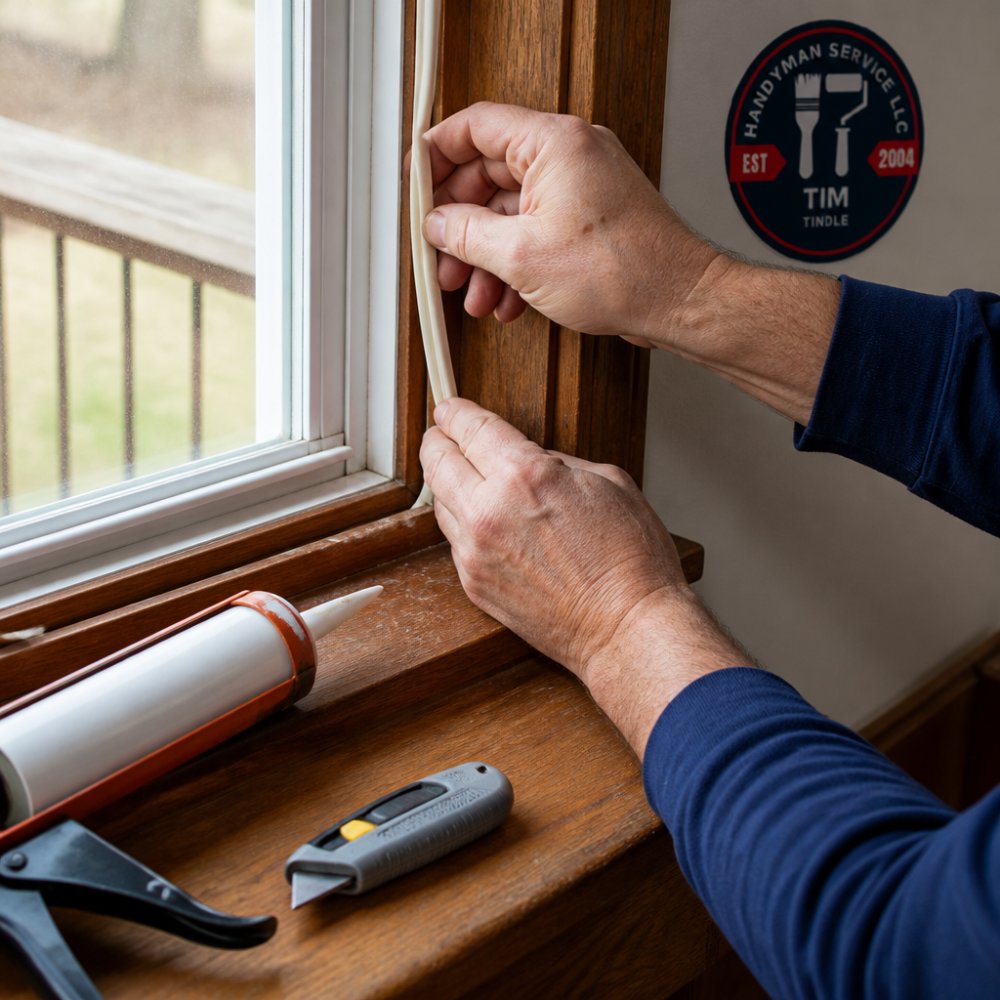
Frame gaps sit between the window frame and the wall. They do not move, so you can seal them shut.
- Clean the gap and let it dry.
- Remove old, cracked caulk with a putty knife.
- Fill deep gaps with backer rod first.
Sash and Moving Joints
The window sash is the part that slides or swings. It has to move, so caulk will crack there, use weatherstripping instead. It flexes with the sash and keeps the seal tight through the season.
| Gap Type | Location | Best Fix | Why |
|---|---|---|---|
| Stationary gap | Frame to wall, trim | Caulk | Gap never moves |
| Moving joint | Sash, sliding tracks | Weatherstripping | Flexes with the window |
| Wide or uneven gap | Old frames | Rope caulk | Presses into odd shapes |
| Full window face | Any window | Insulation film | Adds a second air barrier |
Window Caulking for Drafts: Sealing Stationary Joints
Window caulking for drafts works best on joints that never move: the frame, the trim, and the sill where it meets the wall. Get the sealant-to-substrate match wrong, though, and the bead will crack, peel, or trap water inside the wall cavity by spring.
Caulk is a flexible sealant that fills gaps and cures into a rubbery barrier, blocking airflow and stopping heat loss at the source. The trick is picking the right chemistry for the surface and location.
Match the Sealant to the Frame Material
| Frame material | Interior joint | Exterior joint | Avoid |
|---|---|---|---|
| Wood | Paintable acrylic latex | Siliconized acrylic or 100% silicone | Pure silicone indoors if you plan to paint the trim |
| Vinyl | Acrylic latex labeled for vinyl | 100% silicone labeled for vinyl/PVC | Solvent-based caulks that can stain or soften PVC |
| Aluminum / metal | Acrylic latex | 100% silicone | Polyurethane on bare aluminum (adhesion varies) |
| Fiberglass | Acrylic latex | 100% silicone | Oil-based caulks that yellow |
Homeowners often grab one tube of silicone for every job. Silicone is right outdoors and around wet areas, but it will not take paint, so it is a poor finish for interior trim you plan to repaint. Acrylic latex costs less, cleans up with water, and takes paint, which is why most interior window trim gets acrylic.
Where NOT to Caulk
This is the step most guides skip, and it causes the most callbacks.
- Do not caulk the sash to the jamb on an operable window. If the sash is supposed to slide or swing, caulk will lock it shut or tear the first time you open it.
- Do not plug the weep holes. Vinyl and aluminum windows have small drainage slots at the bottom of the frame or sill. They let condensation and wind-driven rain escape. Seal them and water backs up into the wall.
- Do not caulk over a wet or dirty joint. Adhesion fails and the bead peels within a season.
Step-by-Step Application
- Scrape out old caulk and loose paint with a putty knife; a five-in-one tool works well in corners.
- Wipe the area clean and dry with a damp rag, then a dry one.
- If the gap is deeper than about 1/4 inch, press in backer rod (closed-cell foam) so the caulk has a base and uses less material.
- Cut the nozzle at a 45-degree angle, sized to the gap.
- Push the gun forward, not backward, pushing forces caulk into the gap; pulling drags it across the surface.
- Smooth the bead with a wet finger or caulk tool.
- Let it cure per the label. Most acrylic latex caulks skin over in under an hour and fully cure in 24 hours; silicones vary.
Silicone vs. Acrylic Caulk
Silicone caulk lasts longer and handles water well, use it outside. Acrylic caulk costs less and takes paint, use it inside for a clean finish. For most interior window trim, acrylic is the better pick; for exterior sill and frame joints exposed to rain and freeze-thaw cycles, silicone wins.
How to Weatherstrip a Window That Opens
How to weatherstrip a window comes down to two questions: how big is the gap, and what kind of window is it? Pick the wrong strip and the sash will not latch, or the seal will crush flat in a month.
Call 720-989-4123 for a free estimate →
Pick the Strip by Gap Size and Window Type
| Strip type | Best gap size | Best for | Watch out for |
|---|---|---|---|
| Felt | 1/8 in. or less | Double-hung and sliding sashes, light drafts | Compresses over time; replace every season or two |
| Foam tape (open or closed cell) | 1/8 to 1/4 in. | Casement and awning frames, easy DIY | Too thick and the sash will not close; measure first |
| V-shaped vinyl (V-strip) | 1/8 to 1/4 in. | Sliding tracks and jambs, longest life | Needs a clean, straight groove or channel |
| Door sweep / bulb seal | 1/4 in. and up | Bottom of sliding windows, large gaps | Not for side jambs |
| Spring metal | 1/8 to 1/4 in. | Older wood double-hungs | Can scratch painted jambs; harder to install |
Rule of thumb: if the gap is wider than a quarter, weatherstripping alone will not close it. Fix the frame or sash first, or use rope caulk as a seasonal stopgap.
Match the Strip to the Frame Material
- Wood frames: felt and V-strip both work; V-strip lasts longer because it does not mat down like felt. Avoid spring metal on freshly painted jambs.
- Vinyl frames: use vinyl or foam strips labeled for vinyl. Clean the surface with rubbing alcohol first, vinyl can have a mold-release film that defeats the adhesive.
- Metal frames: foam tape and V-strip both work. Avoid anything that reacts with bare aluminum; stick to products labeled for metal.
Install It Without Locking the Window Shut
- Measure each side of the sash and the frame where the strip will sit.
- Cut the strip about a half inch longer than needed so it compresses into corners.
- Clean the track or frame edge with rubbing alcohol and let it dry.
- Peel the backing and press the strip in place, corner to corner.
- Close the window and check the fit, the sash should latch with light pressure.
- Trim excess with scissors or a utility knife.
Test the window after. If it sticks or will not latch, the strip is too thick. Swap to a thinner option. If the sash rattles, the strip is too thin, step up one size.
When to Replace Instead of Re-Strip
Weatherstripping is a wear item. If you re-strip the same window every winter, the sash or frame is likely out of square, and no strip will hold. Look for these signs:
- The sash rocks in the frame when you push it.
- The gap is uneven, wide at one corner, tight at the other.
- The lock will not engage without lifting or pushing the sash.
Any of those point to a frame or sash problem, not a strip problem, a repair-or-replace decision, covered next.
Temporary Window Insulation Film and Other Winter Fixes
Temporary window insulation film is a clear plastic sheet you shrink onto the frame with a hair dryer. It adds a second air barrier and cuts drafts on windows you never open. Kits are sold at most hardware stores.
Other quick, low-cost solutions:
- Insulated curtains block cold air at night.
- Rope caulk presses into stubborn gaps and peels off in spring.
- A rolled towel along the sill works as a temporary fix.
Rope caulk is the best pick for seasonal sealing: a reusable seal that molds into odd shapes and comes off clean when the weather warms.
Repair or Replace? When a Drafty Window Frame Needs a Pro
Repair makes sense when the frame is solid and the glass is tight. Replace when the frame is rotted, warped, or the glass has lost its seal.
Call a pro when you see:
- Soft or crumbling wood around the frame
- A window that will not close or latch
- Fog or moisture between the panes
The U.S. Department of Energy guide to air sealing notes that sealing air leaks is one of the most cost-effective ways to cut heating costs. The EPA indoor air quality guidance also warns that a too-tight home needs fresh air, so do not seal every gap without thinking about ventilation.
If you want the job done right the first time, Handyman Service Aurora can help. We offer free estimates and can handle carpentry, painting, and general repairs in one visit.
Winter drafts will keep testing your windows every year, but most gaps are easy to seal once you know where they are.
Frequently Asked Questions
How do I seal a window in winter without making a permanent change?
For a temporary seal, use rope caulk to press into frame gaps and cover the whole window with a clear insulation film kit. Both come off in spring without damaging paint or trim. Rope caulk works well on stubborn gaps around the sash and trim, and film stops cold air across the full opening. Avoid spray foam and permanent caulk on movable joints, since they can bond the sash shut or crack when the frame shifts.
Can I apply weatherstripping in cold weather?
Yes, but surface temperature matters. Most adhesive-backed weatherstripping needs the frame above roughly 50°F to bond properly, so clean the surface and warm it with a hair dryer before pressing the strip into place. If the frame is too cold, choose a felt or vinyl strip you can tack or staple instead of relying on adhesive. Test the window by opening and closing it a few times after installation to confirm the seal.
How do I know whether to repair or replace a drafty window?
Repair makes sense when the frame is solid, the glass is intact, and the draft comes from worn weatherstripping, missing caulk, or a loose sash. Replacement is the better call when the frame is rotted, the glass is cracked, or the window is single-pane and you want real energy savings. A practical test: if sealing the gaps still leaves noticeable cold air and condensation, the window itself is the problem. A licensed handyman can assess the frame and give you a straight answer.
Do window draft stoppers actually work?
They work as a short-term fix for specific gaps. Door snakes and foam strips block air moving under a sash or along a sill, and they are cheap and easy to remove. They do not fix gaps in the frame itself or worn weatherstripping, and they will not stop heat loss through single-pane glass. Use them alongside caulk, weatherstripping, or insulation film for a more complete seal, and treat them as a bridge until a permanent repair is done.