 how-to
How to Fix Minor Plumbing Leaks at Home
Table of Contents
- How to Identify and Locate a Minor Pipe Leak
- How to Stop a Small Pipe Leak Temporarily
- Pipe Repair Clamp for Small Leaks: When and How to Use One
- How to Fix a Copper Pipe Leak at a Joint
- Temporary Patch vs. Permanent Repair: Choosing the Right Fix
- Cost to Repair a Leaking Pipe: What to Expect
- When to Call a Professional for Minor Plumbing Leaks
- Frequently Asked Questions
Last Updated: October 20, 2026
How to Identify and Locate a Minor Pipe Leak
Minor plumbing leaks are small, slow drips or seeps from a pipe, joint, or fitting that you can usually trace to one spot and fix without cutting out a whole section of pipe.
Start by confirming you actually have a leak, not condensation. Dry the pipe completely with a towel, then watch it for a few minutes.
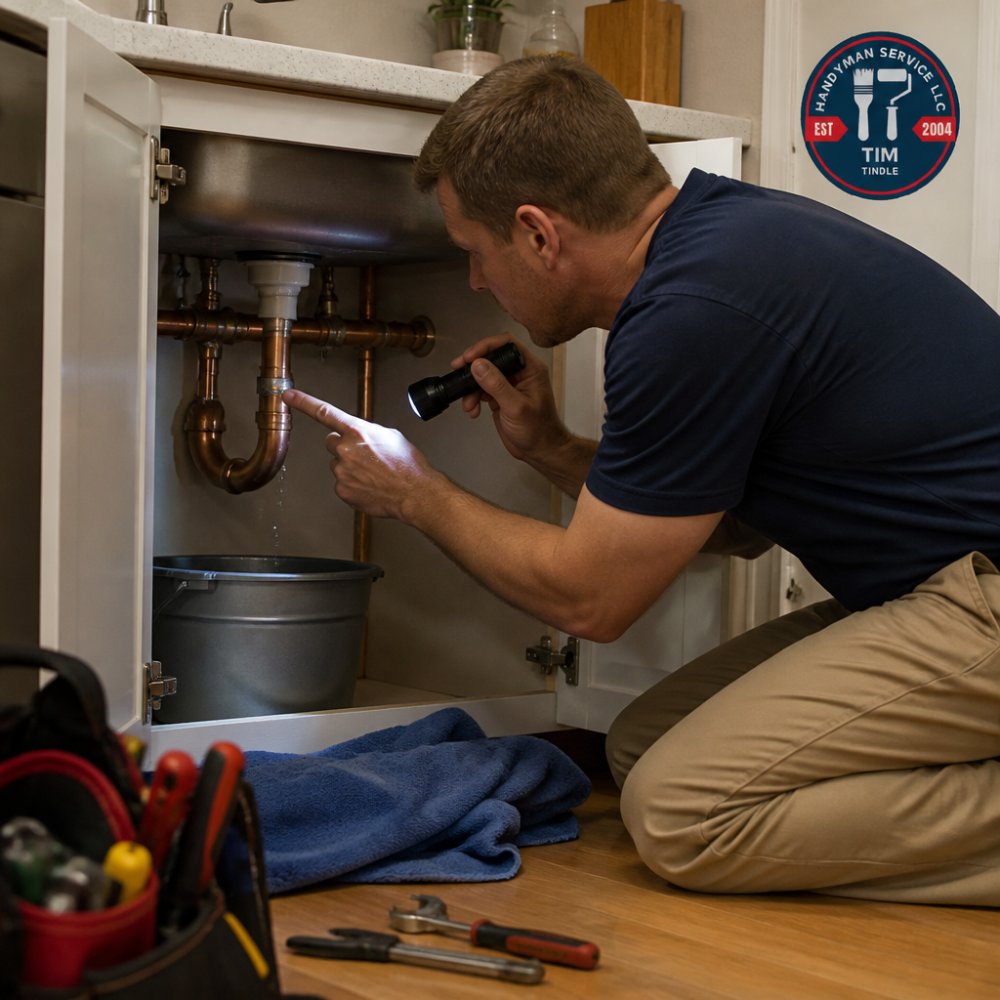
Distinguishing Pipe, Fitting, Condensation, and Appliance Leaks
The source changes the fix, so pin it down before you buy anything.
- Pipe body leak: water seeps through the pipe wall itself. Common on older copper and on PVC near joints.
- Fitting or joint leak: the drip starts right where two pieces connect. This is the most common minor leak.
- Condensation: moisture on a cold pipe, no steady drip. Insulate the pipe rather than repair it.
A quick test: wrap a dry paper towel around the suspect joint and check it after ten minutes. The wet spot tells you exactly where the water starts.
How to Stop a Small Pipe Leak Temporarily
Before you touch tape or putty, stop the water and make the area safe. This is the step most guides rush, and it is the one that prevents a small drip from becoming a flooded cabinet or a shock hazard.
Find and operate the right shutoff valve
There are three tiers of shutoff, and you want the smallest one that isolates the leak:
- Fixture stop: an oval handle or a small screwdriver-slot valve on the supply line under the sink, behind the toilet, or behind the washing machine. Turn an oval handle clockwise until it stops. For a slot-style valve, turn the slot a quarter turn so it sits perpendicular to the pipe.
- Branch valve: a gate or ball valve on the line feeding a bathroom or kitchen group, often in a basement or utility closet.
- Main shutoff: the whole-house valve where the water line enters, typically near the meter or the front foundation wall. A ball valve has a lever, a quarter turn across the pipe shuts it off. A gate valve has a round wheel you turn clockwise several turns.
If a valve has not been turned in years, work it gently and expect it to be stiff. A valve that will not close fully is itself a repair item, note it and call a plumber rather than forcing it and snapping the stem.
Relieve pressure and drain the line
Closing the valve stops new water, but the pipe still holds pressure. Open the lowest faucet on that branch, usually the tub spout or an outdoor sillcock, and let it run until it stops. Then open a second, higher faucet to let air in so the line drains. For a fixture-level repair, open the faucet the supply line feeds. Water will keep dribbling for a minute or two; that is normal.
Watch for electrical hazards around standing water
This is the part almost no guide mentions. Water and electricity share the same cavities under sinks and near water heaters.
- If water is pooling anywhere near an outlet, a junction box, a disposal, a dishwasher, or the electrical panel, do not stand in the water. Shut off the circuit at the breaker panel first, then mop up.
- Never use a shop vac or a corded tool in standing water near an energized circuit.
- If you smell burning or see scorching near a wet connection, leave the circuit off and call an electrician before a plumber.
- A leak that has soaked drywall near a ceiling light or a receptacle is a stop-and-call situation, not a patch situation.
Apply the temporary fix
With the water off, the line drained, and the area dry:
- Clean the pipe around the leak with a rag or fine abrasive pad so tape and putty can grip.
- Dry the surface completely, patches will not bond to a wet pipe.
- Apply your chosen patch (self-sealing tape, epoxy putty, or a repair clamp).
- Wrap or press firmly and hold steady pressure per the product directions.
- Open the nearest faucet, then restore water slowly at the valve and watch the patch for a full minute before closing the cabinet.
A temporary fix holds until you can do a permanent repair or get a plumber out. It is not a long-term solution.
Pipe Repair Clamp for Small Leaks: When and How to Use One
A pipe repair clamp is a metal sleeve with a rubber gasket that bolts over the leak and seals it under pressure.
Use a clamp when the leak sits on the pipe body, not at a joint, and the pipe is sound around the damage.
To install one:
- Shut off the water and dry the pipe.
- Slide the clamp over the leak with the gasket centered on the damage.
- Tighten the bolts evenly, alternating sides so the gasket seats flat.
- Turn the water on slowly and check for seepage.
A repair clamp is a solid stopgap. For a permanent fix on a joint, you'll want to go further.
Call 720-989-4123 for a free estimate →
How to Fix a Copper Pipe Leak at a Joint
Most copper joint leaks come from a failed solder connection or a loose threaded fitting.
For a threaded connection, try tightening the fitting a quarter turn first. If that stops the drip, you're done.
For a soldered joint that keeps weeping, the permanent fix is to cut out the bad section and re-solder or replace it with a push-fit fitting.
Temporary Patch vs. Permanent Repair: Choosing the Right Fix
The choice comes down to three things: pipe material, leak location, and how long you need the fix to last. Here's how we think about it:
| Situation | Best Fix | Lasts | Who Should Do It |
|---|---|---|---|
| Small leak on straight pipe body | Repair clamp or self-sealing tape | Weeks to months | DIY-friendly |
| Threaded joint drip | Tighten fitting, then plumber's tape | Permanent if it holds | DIY-friendly |
| Soldered copper joint leak | Cut out and re-solder or push-fit | Permanent | Pro recommended |
| PVC crack near a joint | Epoxy putty or cut-and-replace | Temporary to permanent | DIY or pro |
| Appliance supply line leak | Replace the hose or valve | Permanent | DIY-friendly |
Tape and putty are patches. Clamps and fitting repairs are closer to permanent. Replacing the failed part is the only true permanent fix. Pick the level that matches the risk: a slow drip under a sink can wait for a weekend, but a leak near electrical or in a ceiling cavity should get professional attention now.
Cost to Repair a Leaking Pipe: What to Expect
Cost tracks three variables: where the leak is, what the pipe is made of, and whether the fix is a patch or a replacement. Use the ranges below as planning figures, not quotes, actual prices vary by market, access difficulty, and whether drywall has to be opened.
What drives the price
- Access. A leak under a sink is minutes of labor. A leak inside a wall or ceiling means opening, drying, and patching finish, often the largest line item.
- Material. PEX and PVC are forgiving and cheap to repair. Copper needs a torch or a press tool and a skilled hand. Galvanized steel is the worst case: it often cannot be patched and must be cut out.
- Patch vs. replace. Tape and putty cost a few dollars. A repair clamp runs roughly $5-$20 at a hardware store. A cut-and-replace on a short section is a labor job, not a parts job.
- Time of call. Emergency and after-hours rates run higher than scheduled weekday work.
Rough planning ranges
These are typical residential figures for minor leaks; treat them as ballparks and get a written estimate before work starts.
| Situation | Typical range | Notes |
|---|---|---|
| DIY tape or putty patch | $5-$25 in materials | Temporary; hours to weeks |
| DIY repair clamp | $5-$20 in materials | Straight pipe body only |
| Pro tighten or reseal a threaded joint | $75-$200 | Often a minimum service call |
| Pro repair on exposed copper or PEX | $150-$400 | Includes fittings and labor |
| Leak inside a wall or ceiling | $300-$1,000+ | Adds access, drywall, and drying |
| Appliance supply line or valve swap | $100-$300 | Parts are cheap; labor is the cost |
DIY vs. call: a simple decision rule
Do it yourself if the leak is visible, on an exposed straight run or threaded joint, the pipe is sound around the damage, and you can shut the water off cleanly.
We provide free estimates so you know the scope before any work starts. For current pricing, call us or request a quote and we will walk you through it.
When to Call a Professional for Minor Plumbing Leaks
Some leaks are fine to patch yourself. Others need a licensed pro, and knowing the difference protects your home. Call a professional when:
- The leak is inside a wall, ceiling, or floor.
- The pipe is corroded, crushed, or split.
- Water is pooling near electrical wiring or a panel.
- You've patched the same spot twice and it keeps leaking.
Hidden leaks are the ones that cost the most. Moisture behind a wall can rot framing and grow mold long before you see a drip. If you smell mustiness or notice a bulge in the drywall, stop patching and get it looked at.
Frequently Asked Questions
How do you find the source of a minor pipe leak?
Dry the area completely, then wrap suspect pipe joints with a paper towel or toilet paper. Turn the water back on and watch for the first spot to darken. For hidden leaks, check the water meter: shut off all fixtures and see if the dial still moves. Common culprits include threaded connections, supply lines, and drain fittings. If you cannot pinpoint the source after 15 minutes, call a licensed plumber to avoid chasing water damage.
Will plumber's tape stop a small leak?
Plumber's tape (Teflon tape) is a thread sealant, not a patch. It prevents leaks on threaded connections when applied correctly: wrap clockwise around the pipe threads, three to four turns, then tighten the fitting. It will not stop a leak on a pinhole, crack, or soldered joint. For those, use epoxy putty, a repair clamp, or self-sealing tape as a temporary fix, and plan a permanent repair.
Can you repair a leaking pipe without replacing it?
Yes, for minor leaks on accessible pipes. Epoxy putty, pipe repair clamps, and self-sealing tape can seal small holes or cracks temporarily. However, these are stopgap measures. A copper pipe with a pinhole often signals internal corrosion, and a patch may fail under pressure. If the leak returns or the pipe is over 30 years old, replacing the section is the reliable fix. A licensed plumber can advise on the best option.
When should you call a plumber for a small leak?
Call a plumber if the leak is on a main water line, behind a wall, under a slab, or on a gas line. Also call if you cannot shut off the water, if the leak returns after a temporary fix, or if you see mold or sagging drywall. For a slow drip on an accessible copper or PVC joint, a DIY repair may suffice. Contact us for a free estimate.
A slow drip can turn into a soaked cabinet, a stained ceiling, or a mold problem faster than most homeowners expect. If you're not sure whether your leak is a quick patch or a bigger repair, don't gamble with it. Handyman Service Aurora offers licensed, insured service across the Denver Metro area, with free estimates and transparent pricing before any work begins. Call 720-989-4123 for a free estimate and get your leak fixed right the first time.