 how-to
How to Fix Paint Drips on Walls: Step-by-Step
Table of Contents
- Why Paint Drips and Runs Happen
- How to Identify Paint Drips, Runs, and Brush Marks
- How Long Paint Takes to Dry Before Sanding
- How to Fix Wet Paint Drips
- Best Tool to Remove Paint Drips and Dried Paint
- How to Remove Dried Paint Drips From Walls
- How to Prevent Paint Drips When Painting
- Repairing Drips on Textured Walls and Matching the Finish
- Frequently Asked Questions
Last Updated: October 12, 2026
Why Paint Drips and Runs Happen
Paint drips and runs occur when too much paint accumulates on a surface and gravity pulls it downward. This happens most often when you apply paint too thickly in a single coat. Thick applications don't dry evenly and can't hold their shape against the weight of the wet paint.
Several factors make drips more likely:
- Applying paint too quickly without letting coats dry between applications
- Using a roller or brush with too much paint on it
- Painting in cool or humid conditions where drying takes longer
- Painting on vertical surfaces where gravity works against you
- Not maintaining consistent pressure while rolling or brushing
The key difference between a drip and a run is timing. A drip forms when a small amount of paint falls from a single point. A run happens when a wider stream of paint moves down the wall. Both create raised paint that needs to be removed after it dries.
Understanding why drips happen helps you prevent them in future projects. But if you're dealing with drips already on your walls, how to fix paint drips depends on whether the paint is still wet or has fully dried.
How to Identify Paint Drips, Runs, and Brush Marks
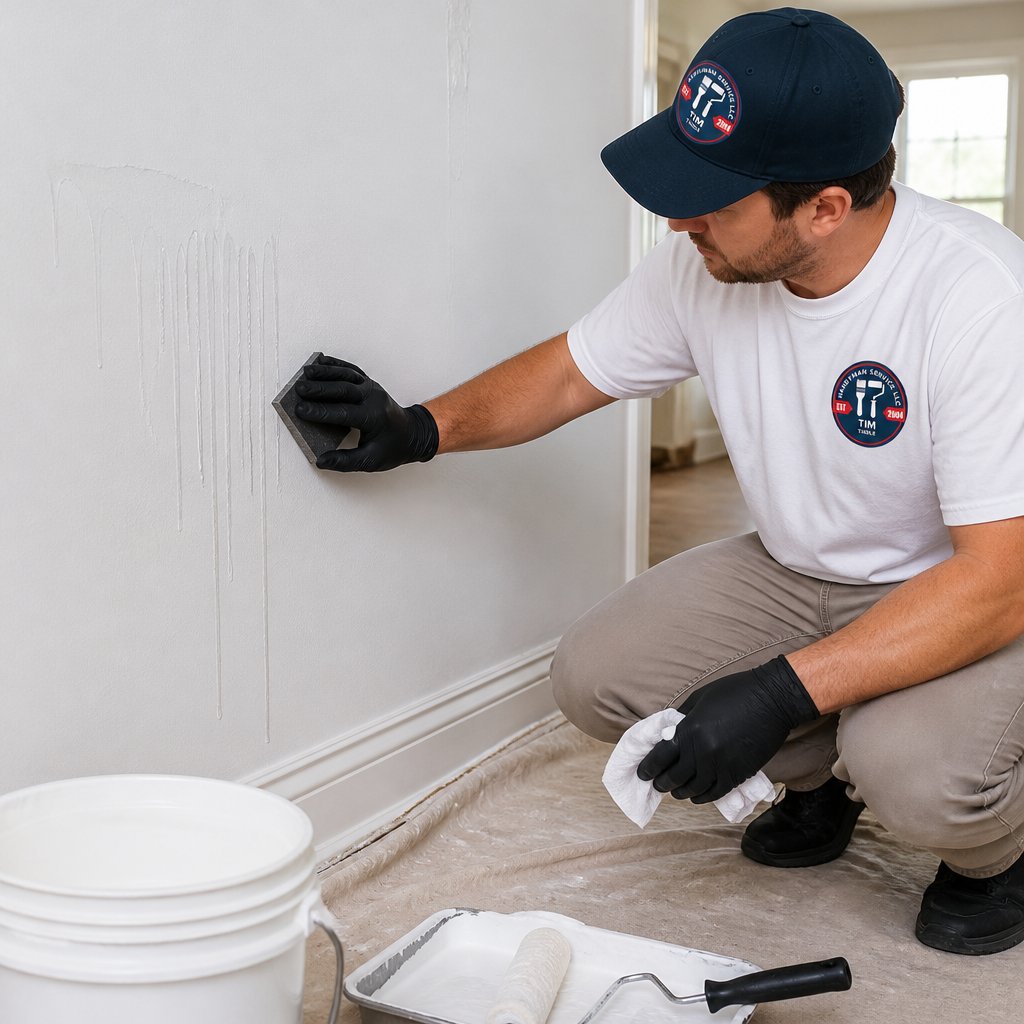
A paint drip is a vertical line of paint that hangs from a point on the wall. It's usually thicker at the top and tapers as it falls.
A paint run is a wider stream of paint that flows downward. Runs cover more wall area than drips and create a more noticeable defect. Both drips and runs feel rough to the touch once they dry.
Brush marks are horizontal lines left by the bristles of a paint brush. They're most visible on flat finishes where light hits the wall at an angle. Brush marks feel like shallow grooves in the paint.
Raised paint is the general term for any paint that sticks up above the surrounding wall surface. This includes drips, runs, and thick application areas.
The best way to identify these issues is to inspect your walls in good lighting. Use a work light or flashlight to see shadows cast by raised paint.
How Long Paint Takes to Dry Before Sanding
Drying time depends on the type of paint, temperature, and humidity in your home. Most interior latex (water-based) paints dry to the touch in 1-2 hours.
Latex paint typically needs 4-8 hours before you can sand it lightly. For a full cure where the paint is completely hard, wait 24 hours or until the manufacturer's label says it's safe to sand.
Oil-based paint takes much longer. Wait at least 12-24 hours before sanding oil-based finishes. Oil paint cures slower than latex, and sanding too early can gum up your sandpaper.
Temperature and humidity matter. Paint dries faster in warm, dry conditions. In cool or humid weather, add several extra hours to these timelines. If your home is below 50°F or humidity is above 85%, wait longer before sanding.
Check the paint can label for the manufacturer's specific recommendations. Different brands have different formulations, so timing can vary.
How to Fix Wet Paint Drips
Fixing wet paint drips is the easiest approach because the paint is still soft and easy to remove. Act quickly while the paint is still wet or tacky.
Step 1: Use a damp brush or cloth
Dip a clean brush or cloth in water and gently brush the wet drip. The moisture helps soften the paint so you can work it back into the surrounding wall.
Step 2: Feather the drip into the wall
Blend the drip into the surrounding paint by brushing outward from the drip toward the flat wall. This spreads the paint thinly so it dries evenly with the rest of the wall.
Step 3: Wipe excess paint
Use a damp cloth to wipe away any excess paint. Don't leave puddles of water on the wall, just enough moisture to help blend the paint. Let the area dry completely before applying another coat.
This method works best if you catch the drip within the first hour of painting.
Best Tool to Remove Paint Drips and Dried Paint
Once paint dries, you need the right tools to remove the raised paint safely without damaging the wall underneath.
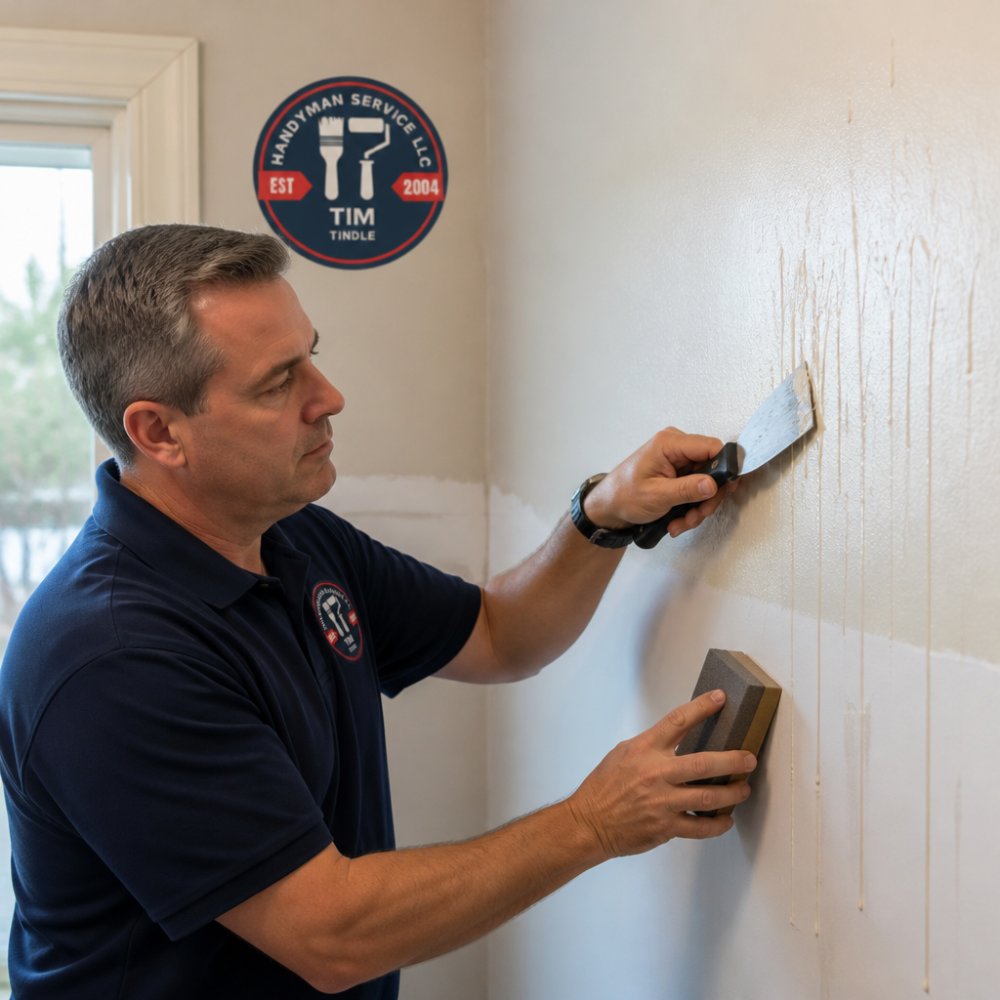
Razor blade or paint scraper works well for thick, hardened drips. A sharp blade cuts through dried paint quickly.
Sanding block with medium-grit sandpaper is ideal for smaller drips and for smoothing the area after scraping. A sanding block gives you better control than loose sandpaper.
Putty knife works for small drips and gentle scraping. A putty knife is less aggressive than a paint scraper, making it safer for delicate wall surfaces.
Drywall sanding sponge is useful for textured walls where you want to preserve the texture. Sanding sponges conform to the texture rather than flattening it. They're gentler than hard sanding blocks.
For most homeowners, a combination approach works best: use a scraper first to remove the bulk of the drip, then sand smooth with medium-grit sandpaper.
How to Remove Dried Paint Drips From Walls
To fix paint drips that have dried takes patience and the right technique. Rushing the process can damage your wall. Follow these steps in order for the best results.
Shaving or Scraping Down Raised Paint
Start by removing the bulk of the raised paint with a scraper or blade. Hold your scraper at a shallow angle, about 30 degrees, against the wall. Push gently but firmly to lift the dried paint away from the surface.
Work slowly and use short strokes. Don't try to remove all the paint in one motion. Multiple light passes are safer than one aggressive scrape.
For thick drips, you may need several passes. After each pass, check your progress. Stop scraping when the drip is close to level with the surrounding wall. You'll finish the job with sanding, so don't try to make it perfect with the scraper alone.
If you're working on drywall, be extra careful not to dig into the surface. Drywall is softer than painted plaster or concrete, so light pressure is important. If you accidentally gouge the wall, you'll need to fill it with spackle before repainting.
Call 720-989-4123 for a free estimate →
Sanding the Drip Until It Is Flush With the Wall
After scraping, use sandpaper to smooth the remaining raised paint and blend it with the surrounding wall. Sanding creates a smooth transition so the repair is invisible after repainting.
Start with medium-grit sandpaper and sand in circular motions. Apply light pressure and let the sandpaper do the work. Sand until the drip feels smooth to the touch and is level with the wall surface.
Check your progress frequently by running your hand across the area. You should feel a smooth surface with no bumps or ridges. If you still feel raised paint, continue sanding.
Once the drip is flush, switch to fine-grit sandpaper for a final pass. This smooths out any scratches left by the medium-grit paper and creates a better surface for repainting.
Choosing an Appropriate Sandpaper Grit
Sandpaper comes in different grits, which measure how coarse or fine the abrasive is. For paint drips, you need the right grit to remove the defect without damaging the wall.
Medium-grit sandpaper (80-120 grit) removes dried paint quickly. Use this first to bring the drip down close to the wall surface. 100-grit is a good middle ground, aggressive enough to remove paint but not so coarse that it scars the wall.
Fine-grit sandpaper (150-220 grit) smooths the area after medium-grit sanding. Fine-grit creates a smooth surface that's ready for paint. Use this for your final sanding pass.
Avoid coarse sandpaper (40-60 grit) on walls. Coarse grits remove too much material and can gouge drywall or create visible scratches.
For textured walls, use a sanding sponge instead of flat sandpaper. Sanding sponges are gentler and conform to the texture, so they won't flatten it.
Cleaning Dust Before Repainting
After sanding, dust settles on the wall and surrounding surfaces. You must remove this dust before repainting, or it will create a rough, uneven finish.
Use a damp cloth or tack cloth to wipe the sanded area. A tack cloth is a special cloth that's sticky and picks up fine dust particles. Wipe gently to avoid creating new marks on the wall.
Let the area dry completely before painting. If you paint over damp surfaces, the paint won't adhere properly and may peel later.
Vacuum the room to capture dust floating in the air. This prevents dust from settling on wet paint while you're applying the new coat.
How to Prevent Paint Drips When Painting
Preventing drips is easier than fixing them after they dry. Use proper technique and the right amount of paint to avoid problems.
Load your brush or roller correctly. Don't overload with paint.
Apply thin, even coats. Multiple thin coats look better than one thick coat and are less likely to drip.
Paint from top to bottom. Start at the ceiling and work down toward the floor.
Maintain consistent pressure. When using a roller, apply steady pressure and avoid pressing too hard at the edges.
Watch for drips immediately. Check your work frequently as you paint. Catch wet drips right away by feathering them into the surrounding wall with a damp brush.
Paint in the right conditions. Avoid painting in very humid or cold conditions. Paint dries slowly in these conditions and is more likely to drip.
Use quality paint and tools. Better paint flows more smoothly and is less likely to drip. Quality brushes and rollers hold paint better and apply it more evenly.
Repairing Drips on Textured Walls and Matching the Finish
Textured walls need special care when fixing paint drips. The goal is to remove the drip without flattening the texture around it.
Use a sanding sponge instead of flat sandpaper. Sanding sponges have a flexible, porous surface that conforms to the texture.
Sand gently and carefully. Light pressure is important on textured walls. Too much pressure flattens the texture and creates a visible flat spot.
Match the texture after sanding. If you flatten some texture while sanding, you may need to re-texture the area.
Match the paint sheen. After repainting, make sure the sheen (gloss level) matches the surrounding wall. Flat, satin, and semi-gloss paints reflect light differently.
Apply paint in thin coats. Use the same painting technique that created the original texture.
Consider professional help. For large drips on textured walls or if you're unsure about matching the texture, hiring a professional painter saves time and frustration.
Fixing paint drips takes time but is a straightforward process once you understand the steps.
Frequently Asked Questions
What is the best tool to remove paint drips?
A paint scraper or putty knife works best for wet paint drips, while dried drips require a combination approach: use a razor blade or scraper first to shave down the raised paint, then switch to a sanding block with medium-grit sandpaper (120-150 grit) to smooth the area flush with the wall. For fully cured paint, start with a scraper to remove excess paint before sanding. Always work carefully to avoid gouging the wall surface.
How do you fix dried paint drips on a wall?
Let the paint cure completely (typically 24-48 hours depending on paint type), then use a razor blade or scraper to carefully shave down the raised edges of the drip. Switch to medium-grit sandpaper (120-150 grit) and sand the area in circular motions until it's level with the surrounding wall. Wipe away paint dust with a damp cloth, allow to dry, and touch up with matching paint and sheen if needed.
How long does paint take to dry before sanding?
Most latex paints dry to the touch in 1-2 hours but require 24 hours before sanding safely. Oil-based paints need 16-24 hours or longer depending on humidity and temperature. For fully cured paint (maximum hardness), wait 7-14 days before aggressive sanding. Check your specific paint's label for exact drying times, as conditions like high humidity or cool temperatures can extend these windows.
Can you sand paint drips without damaging the wall?
Yes, with the right technique and tools. Use medium-grit sandpaper (120-150 grit) on a sanding block rather than your hand to maintain even pressure and avoid gouging. Sand in circular motions, checking frequently to avoid sanding through the paint into the drywall. For textured walls, use light pressure and consider using a scraper first to remove most of the raised paint before sanding to preserve the texture pattern.