 how-to
How to Patch Drywall Holes Larger Than 4 Inches
Table of Contents
- When You Need Backing: Understanding Hole Size and Repair Methods
- Drywall Repair Tools List: What You'll Need Before Starting
- Preparing the Hole: Cutting and Installing Backing Strips
- Measuring, Cutting, and Securing the Patch
- Taping, Mudding, and How Long Does Drywall Mud Take to Dry
- Best Practices for Sanding Drywall Patches and Texture Matching
- Finishing and Priming Your Patch
- DIY vs. Professional Repair: When to Call a Handyman
- Frequently Asked Questions
Last Updated: September 20, 2026
When You Need Backing: Understanding Hole Size and Repair Methods
To patch drywall holes larger than four inches, you must address the lack of structural support around the edges. Without backing strips or furring strips behind the patch, it will flex, crack, and pop out.
Holes exceeding four inches require cutting out the damaged area, installing backing for support, securing a new drywall piece, and finishing seams with joint compound and mesh tape.
Drywall Repair Tools List: What You'll Need Before Starting
Essential tools for when you need to patch drywall holes larger than four inches:
- Drywall saw or keyhole saw (cuts the damaged section cleanly)
- Utility knife (scores and trims edges)
- Tape measure and pencil (marks your cut lines)
- Level (ensures backing strips are straight)
- Drill with screwdriver bit (secures patch with drywall screws)
- Putty knife (spreads joint compound smoothly)
- Mesh tape (reinforces seams before mudding)
- Sanding block or sanding sponge (smooths dried compound between coats)
- Dust mask (protects lungs from drywall dust)
- Furring strips or backing board (supports the patch from behind)
A dust mask is essential, drywall dust is fine and irritating. Wear one throughout the sanding phase.
Preparing the Hole: Cutting and Installing Backing Strips
Cutting Out Damaged Drywall
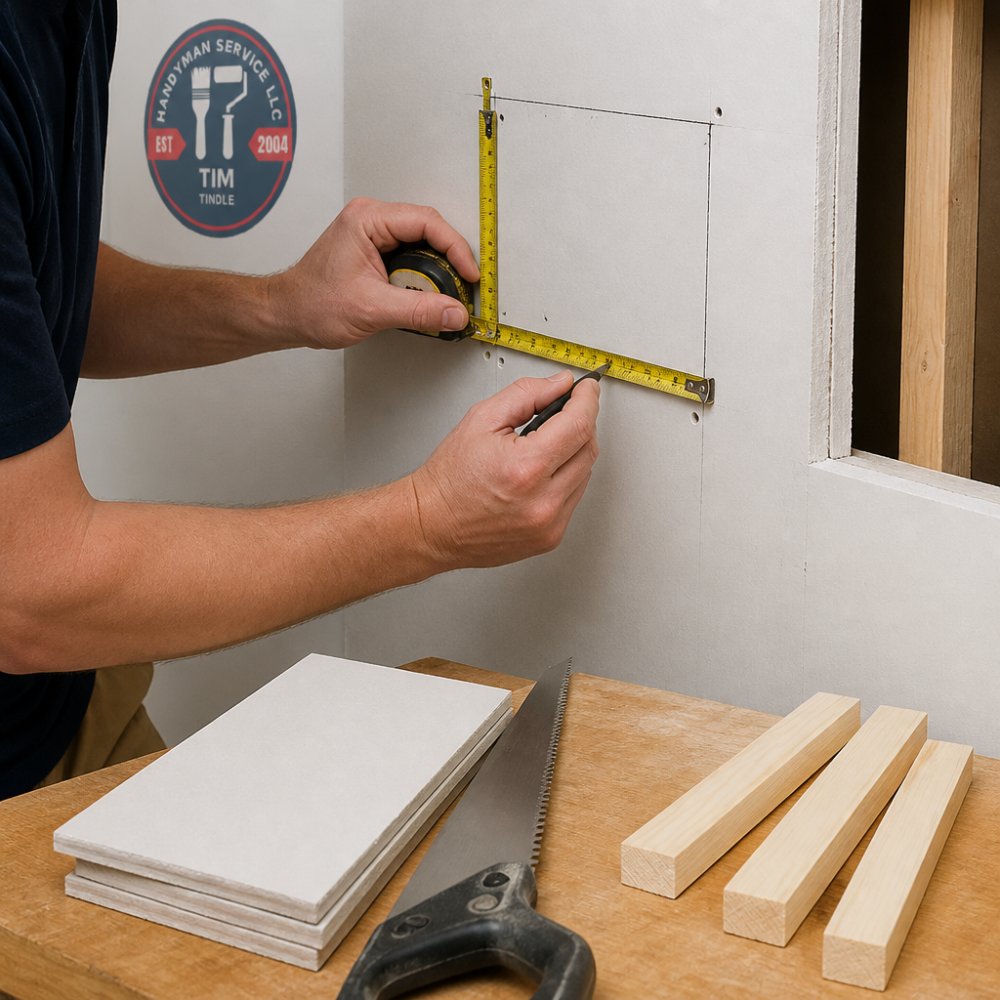
Mark a rectangle around the damage with a tape measure and pencil, extending slightly into solid drywall on all sides.
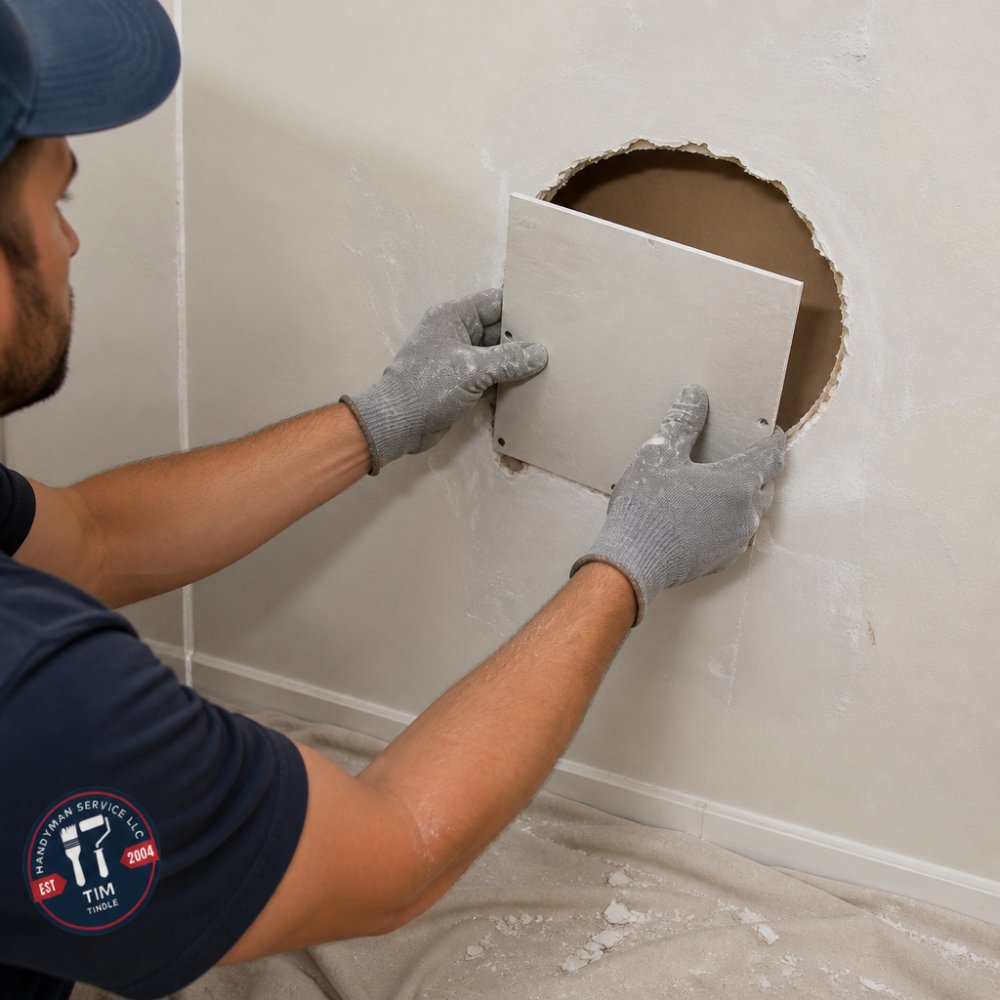
Cut along marked lines with a drywall saw, pushing straight through to create a clean, rectangular opening. Ragged edges make fitting the patch and securing seams harder.
Remove the cut-out section and check the studs or backing behind the hole. Address any damage before patching.
Installing Furring Strips and Backing
Furring strips or backing boards give the patch solid support to screw into. Without them, the patch will flex inward when touched.
Cut backing strips from 1x2 lumber or use a backing board kit, spanning horizontally and extending at least six inches beyond the hole's edges on each side for solid attachment.
Measuring, Cutting, and Securing the Patch
Measure the opening precisely and cut drywall to fit exactly using a drywall saw.
Taping, Mudding, and How Long Does Drywall Mud Take to Dry
Once the patch is secured, reinforce the seams with mesh tape and joint compound. This is where finishing quality matters most.
Best Practices for Sanding Drywall Patches and Texture Matching
Sand between each coat of joint compound once fully dry using a sanding sponge or block with 120-150 grit sandpaper. Sand gently in circular motions to avoid exposing mesh tape. Wipe away dust with a damp cloth before the next coat.
Texture Matching: The Hidden Challenge
Texture matching determines whether your patch disappears or stands out. Even flawless mudding fails if texture doesn't match.
Identify your wall texture first. Common textures include:
- Orange peel: Bumpy, uniform surface resembling orange skin. Most common in residential walls.
- Knockdown: Flattened peaks created by spraying texture then lightly flattening it with a trowel. Creates a subtle, directional pattern.
- Popcorn (acoustic): Thick, bumpy spray-on texture. Older homes often have this; it's less common in new construction.
- Smooth drywall: No texture, requires only primer and paint.
Texture matching troubleshooting:
- Texture looks too thin or sparse: You're holding the can too far away or spraying too quickly. Move closer (10-14 inches) and use longer spray bursts.
- Texture looks too thick or clumpy: You're holding the can too close or spraying too long. Move back to 16-18 inches and use shorter bursts.
- Texture color doesn't match: Texture spray yellows over time. If your wall's texture is yellowed and your spray is bright white, the mismatch will be obvious once paint is applied. Prime and paint the entire wall (not just the patch) to ensure uniform color.
- Knockdown pattern doesn't match: The direction or angle of your trowel flattening is different. Study the existing wall's pattern under raking light (a flashlight held at a low angle) to see the direction clearly, then replicate it.
Finishing and Priming Your Patch
Once all joint compound is dry and sanded smooth, apply primer to the entire patched area. Primer seals the compound and provides a uniform base for paint.
DIY vs. Professional Repair: When to Call a Handyman
Patching drywall holes larger than four inches is doable for homeowners with basic tool skills and patience. However, certain situations warrant professional help. Understanding the trade-offs between DIY and professional repair helps you make the right choice.
Cost and Time Investment
DIY approach:
- Tools: If you don't own a drywall saw, putty knife, sanding sponge, and drill, budget $40-$80 for basic tools. A drywall saw alone costs $8-$15.
- Materials: Drywall patch kit (backing strips, patch, mesh tape, joint compound) typically costs $15-$30 depending on hole size.
- Time: Expect 4-8 hours of active work spread over 3-5 days (accounting for drying time between coats). Sanding and texture matching add another 2-4 hours.
- Total cost: $55-$110 plus your labor.
Professional repair:
- Service call: Handyman rates vary, often including a minimum service charge.
- For a single hole larger than four inches, the total cost depends on location and complexity.
- Texture matching and finishing may add to the cost if your wall has custom textures.
- Total cost varies, and the work is completed efficiently.
The break-even point: If you already own tools and have time flexibility, DIY saves money. If you need the repair completed quickly or lack tools, professional repair is cost-competitive when you factor in your time value.
When DIY Makes Sense
- Single hole, simple wall: A hole on a flat, smooth wall with no texture is the easiest repair. Mudding and sanding are straightforward, and mistakes are forgiving.
- You have time: If you can spread the work over a weekend or longer, drying time is not a constraint.
- You own or are willing to buy tools: If you plan future repairs or have other projects, tool investment pays off.
- Wall texture is simple (orange peel): Orange peel texture is the easiest to match with spray cans. Knockdown and popcorn are harder.
When Professional Repair Is Worth It
- Hole caused by structural damage, water damage, or impact to studs: These issues require assessment and repair beyond simple patching. A professional identifies whether studs are damaged, whether moisture is present, and whether the underlying structure is sound. Patching over structural damage leads to failure.
- Active water leak or moisture: If the wall is wet or shows signs of mold, the leak must be fixed first. A professional can identify the source and coordinate repairs.
- Hole on a ceiling: Overhead work is physically demanding and requires scaffolding or a tall ladder. Mudding overhead is harder than mudding walls. Professional completion is faster and safer.
- Hole near a corner or door frame: Corners and edges are harder to finish seamlessly. Professionals have techniques for blending patches into corners without visible seams.
- Custom or thick texture (popcorn, knockdown, specialty finishes): Matching custom textures is unreliable as a DIY task. A professional spray rig and experience make matching reliable.
- Multiple holes or large patches (12+ inches): Multiple repairs compound the time and drying-time burden. Large patches require more mudding coats and sanding. Professional crews complete these faster.
- You need the wall finished quickly: If you're selling your home, preparing for an inspection, or need the wall ready within days, professional repair eliminates the 3-5 day drying timeline.
- You're uncomfortable with power tools or heights: Safety and confidence matter. If you're unsure about using a drill, sanding sponge, or working on a ladder, professional repair is the right choice.
Frequently Asked Questions
Do I need backing or furring strips for a hole larger than 4 inches?
Yes. Holes larger than 4 inches require backing strips because the patch edges won't have studs to anchor into. Furring strips or wooden backing boards installed across the hole opening provide the structural support needed to screw or nail the new drywall patch securely. Without backing, the patch will flex, crack, and fail over time.
How long does drywall mud take to dry between coats?
Standard joint compound typically dries in 24 hours between coats at normal room temperature and humidity. However, lightweight or quick-setting mud can dry in 4-12 hours. Always check your product's instructions, as drying time varies by brand and environmental conditions. Temperature below 55°F and high humidity will extend drying time significantly.
What's the best way to match texture on a patched area?
After your final mud coat is sanded smooth, identify your existing wall texture (popcorn, orange peel, knockdown, or smooth). Purchase texture spray that matches your pattern and practice on cardboard first. Apply in light, even passes from 6-8 inches away. If your walls are smooth-finished, feathering your final mud coat with a wide putty knife and careful sanding will blend the patch seamlessly without texture.
Should I tackle a large drywall patch myself or hire a professional?
DIY patching works well if you have basic tools, patience, and attention to detail. Large patches require skill in feathering mud, matching texture, and achieving invisible seams. If your wall is textured, in a visible area, or you lack experience with mudding and sanding, professional repair delivers a cleaner finish and saves time. Consider your timeline, skill level, and the patch's visibility before deciding.
Drywall patches larger than four inches require proper backing, reinforced seams, and careful finishing to succeed. The process takes time but produces results that last. Whether you tackle the repair yourself or call a professional, understanding the steps ensures quality results. Handyman Service Aurora specializes in drywall repairs and can handle projects of any size with licensed, insured craftsmanship. Contact us today for a free estimate and peace of mind that your repair is done right.