 how-to
How to Repair Rotted Exterior Wood Trim Step by Step
Table of Contents
- Step 1: Identify the Rot and Find the Moisture Source
- Step 2: Tools and Materials You'll Need for the Repair
- Step 3: Remove the Rotted Wood and Prep the Area
- Step 4: Treat the Wood and Apply Epoxy Resin
- Step 5: Sculpt, Sand, and Paint for a Seamless Finish
- Choosing the Best Wood Filler for Exterior Trim
- How to Prevent Wood Rot on Exterior Trim
- Cost of Professional Exterior Trim Repair
- Frequently Asked Questions
Last Updated: September 13, 2026
Step 1: Identify the Rot and Find the Moisture Source
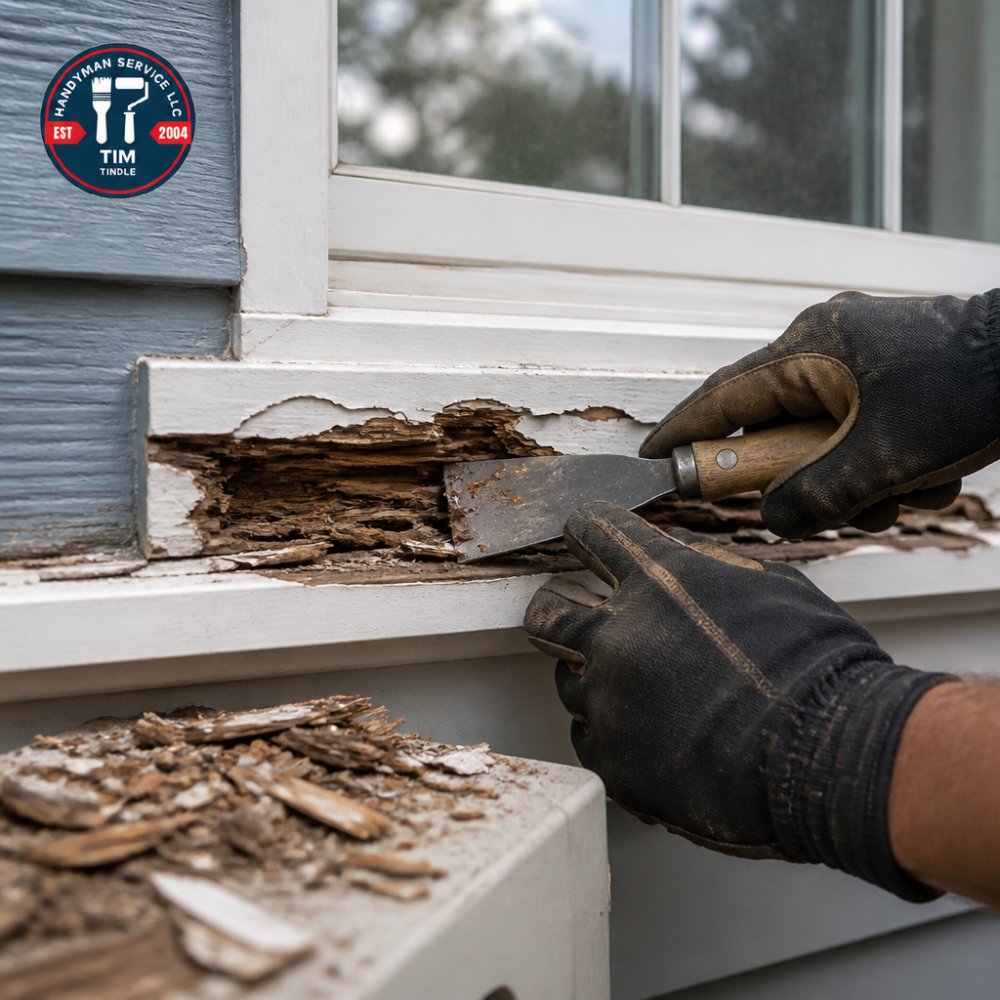
To repair rotted exterior wood trim is to deal with wood that has lost its structural fibers to fungal decay, and it almost never starts as a cosmetic problem. If you're learning how to repair rotted exterior wood trim step by step, the first step isn't epoxy or sandpaper. It's finding where the water gets in, because rot is a symptom, not the disease.
At Handyman Service Aurora, we've observed that the visible damage is usually smaller than the moisture problem behind it.
Dry Rot vs. Surface Damage: What You're Looking At
Dry rot is fungal decay that consumes the wood's cellulose, leaving it soft, crumbly, and often darker than surrounding timber.
Probe before you judge. Press a flat-head screwdriver into the suspect area. If the wood gives way easily or crumbles, the decay runs deeper than the paint suggests. Surface damage, by contrast, is usually just peeling paint or a shallow crack that hasn't reached the wood fibers.
guidance on identifying wood decay and moisture problems
Trace the Water: Roof Leaks, Flashing, and Caulking Failures
Water rarely attacks trim directly. It arrives from above. Check the flashing where the roof meets the wall, the caulking line along the top edge of the trim, and any gutter seams nearby. A failed bead of caulking can channel water into a fascia board for years before you notice a soft spot.
Step 2: Tools and Materials You'll Need for the Repair
A complete exterior trim repair kit is modest, and most of it is already in a typical garage. What matters is matching the material to the depth of the damage.
- Flat-head screwdriver and a wood chisel for probing and excavation
- Putty knife and a wire brush for cleanup
- Two-part epoxy resin with separate resin and hardener
- Wood hardener or fungicide for the surrounding fibers
- Sanding block with 80, 120, and 220-grit sandpaper
- Exterior-grade primer and paint
- Caulking rated for exterior use
Buy epoxy sized to the repair. Small tubes dry out between jobs; a two-part marine epoxy gives you more working time and better adhesion on exterior trim.
Step 3: Remove the Rotted Wood and Prep the Area
Excavation is where most DIY repairs fail, because people stop too early. Remove every trace of rot-softened wood until you reach solid material that resists the chisel.
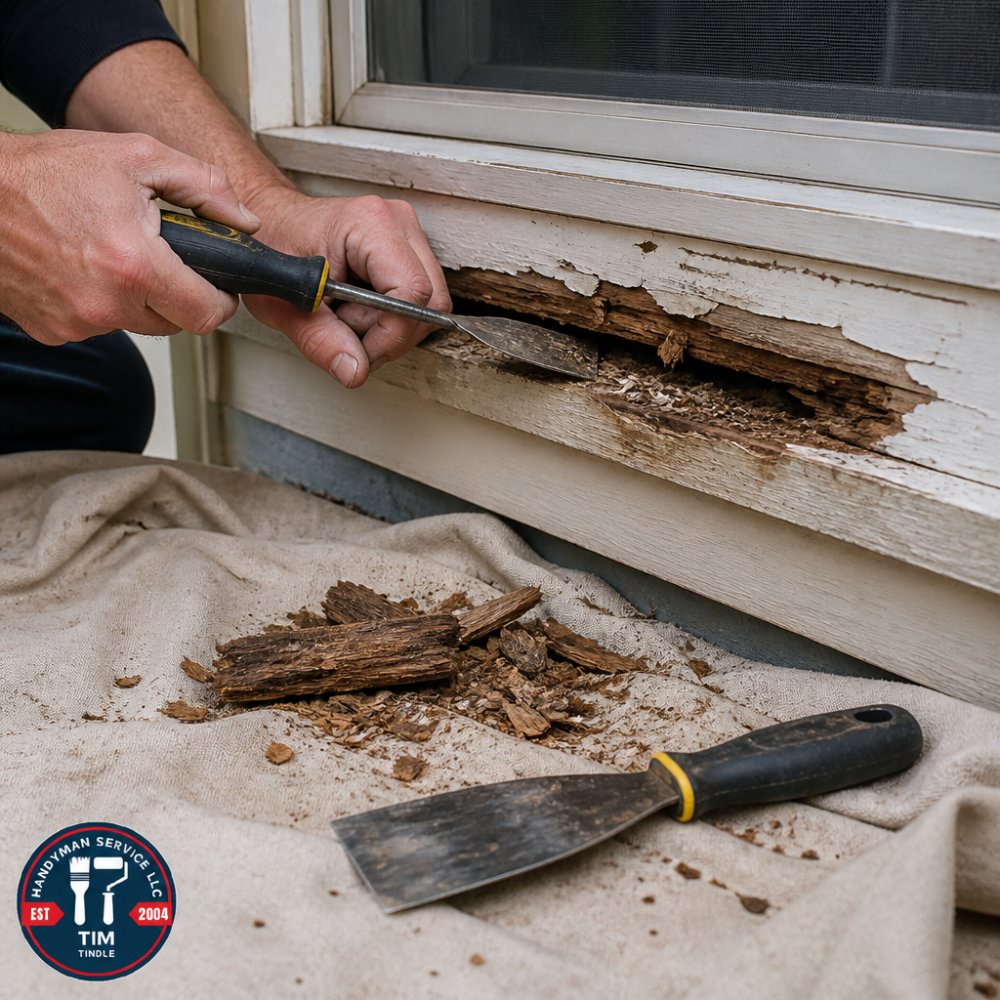
Work along the wood grain to avoid splitting healthy fibers. After excavation, brush out the debris and let the area dry completely. Epoxy won't bond to damp wood, so give it time.
Step 4: Treat the Wood and Apply Epoxy Resin
Treating the exposed wood with a wood hardener or fungicide is the step that separates a repair from a patch. The hardener penetrates rot-softened fibers and restores enough density for the epoxy to grip. Apply it by brush and let it cure per the label.
Then mix your epoxy. Combine the resin and hardener in the ratio the manufacturer specifies, stir for the full recommended time, and work in small batches. Curing time varies with temperature, so avoid applying in direct afternoon sun.
Epoxy vs. Wood Filler vs. Bondo: Which One Holds Up Outside?
For exterior trim, two-part epoxy is the most durable choice. Standard wood filler is designed for interior use and absorbs moisture outdoors, which leads to cracking. Bondo-style auto body filler sets hard and sands well, but it doesn't flex with the wood through seasonal movement.
Step 5: Sculpt, Sand, and Paint for a Seamless Finish
Sculpting the epoxy while it's still firm but not fully cured is easier than sanding it later. Shape it with a putty knife to roughly match the trim profile, then let it cure completely.
Sand in stages: 80-grit to knock down high spots, 120 to refine the shape, and 220 to blend the edges into the surrounding wood grain. Prime the repair with an exterior-grade primer, then apply two coats of paint. Caulk the joints where trim meets siding or flashing.
Choosing the Best Wood Filler for Exterior Trim
Most guides tell you to grab a two-part epoxy and move on. That advice is fine until you're staring at a hairline crack under an eave versus a fist-sized void in a south-facing sill that takes full sun and driving rain. The right filler depends on three variables: depth of the void, exposure to standing water, and how much the surrounding wood moves seasonally.
Call 720-989-4123 for a free estimate →
Match the Filler to the Repair
| Repair Scenario | Best Filler | Why |
|---|---|---|
| Hairline crack, vertical surface, under an overhang | Exterior-grade water-based wood filler | Sands easily, dries fast, adequate when water never pools |
| Shallow gouge on a painted sill, protected exposure | Exterior wood filler or high-solids patching compound | Cheaper than epoxy, paintable, fine for non-structural cosmetics |
| Deep void in a horizontal sill or fascia where water sits | Two-part epoxy (marine or structural grade) | Cures hard, resists moisture intrusion, holds fasteners |
| Rot near a joint that flexes (corner boards, trim returns) | Flexible two-part epoxy or polyurethane-based filler | Rigid fillers crack when the wood moves through freeze-thaw cycles |
| Large void where you need to rebuild a profile | Two-part epoxy thickened with wood flour or silica | Sculptable, carvable, and strong enough to reshape a molding |
Why Bondo-Style Auto Filler Is a Trap Outdoors
Polyester auto body filler sets hard and sands beautifully, which is why it shows up in so many DIY videos. The problem is that it doesn't move with wood. Exterior trim expands and contracts with temperature and moisture, and a rigid polyester patch bonded to a moving substrate will eventually shear away from the edges. It also traps moisture against the wood if the surrounding paint film fails. Use it for interior door casings if you must, not for exterior trim.
What to Look For on the Label
- "Exterior" or "exterior-rated", interior fillers are formulated to dry, not to resist re-wetting.
- Two-part mixing ratio, pre-measured tubes reduce the risk of a batch that never fully cures.
- Working time, most two-part epoxies give you 15-30 minutes at 70°F; warmer temperatures shorten that window fast.
- Paintability, some epoxies need a specific primer to accept topcoat; check before you commit.
Buy epoxy sized to the repair. Small tubes dry out between jobs, and a partially used two-part kit is worthless six months later. If you have multiple trim repairs on the same house, a larger kit is almost always the better buy.
consumer guidance on exterior wood repair products
How to Prevent Wood Rot on Exterior Trim
Prevention is cheaper than repair, but "inspect your trim" is useless advice without a schedule and a list of what to actually look at. Rot almost always starts at the same handful of failure points, and each one has a specific inspection cue.
The Five Failure Points That Cause Most Trim Rot
- Roof-to-wall flashing, Look for lifted, rusted, or unsealed metal where the roof plane meets a vertical wall. Water that gets behind the flashing runs down the wall cavity and exits at the trim.
- Gutter seams and end caps, A slow drip at a seam keeps the fascia board wet for months. Check seams with a garden hose on a dry day and watch for weeping.
- Caulk joints at the top edge of trim, The caulk bead along the top of a window or door casing is the single most common entry point. If it's cracked, chalky, or pulling away, water is already getting in.
- Siding-to-trim gaps, Any gap wider than a credit card lets wind-driven rain behind the trim. Backer rod plus exterior caulk closes it.
- Paint film failures, Cracks, blisters, and peeling paint expose bare wood to spores. A blistered paint film usually means moisture is coming from behind, not from above.
A Season-by-Season Inspection Schedule
| Season | What to Check | Why Now |
|---|---|---|
| Early spring | Gutters, downspouts, and roof flashing after winter freeze-thaw | Ice dams and snowmelt expose flashing failures |
| Late spring | Caulk joints and paint film on south- and west-facing trim | UV exposure breaks down caulk and paint fastest on these elevations |
| Late summer | Probe trim with a screwdriver at the five failure points | Wood is at its driest, so soft spots are easiest to detect |
| Fall | Re-caulk any failed joints before the rainy season | Sealing before wet weather prevents the next rot cycle |
The Screwdriver Probe: Your Cheapest Diagnostic
Once a year, press a flat-head screwdriver into the trim at each failure point. Healthy wood resists. Wood that gives, crumbles, or sounds hollow when tapped has active decay. Mark the spot with painter's tape and address it before the next wet season, a soft spot the size of a quarter is a 30-minute repair; the same spot ignored for two years is a fascia replacement.
Repainting on Schedule
Exterior trim paint isn't just cosmetic, it's the wood's raincoat. In most climates, trim needs a fresh topcoat every 5-7 years, sooner on south- and west-facing elevations that take the most UV. When you repaint, don't just roll over the old film. Scrape any loose paint, sand the edges feathered, spot-prime bare wood with an exterior-grade primer, and caulk joints before the topcoat goes on.
Rot is a moisture problem, not a wood problem. Fix the water path first, then repair the wood. A repair without a moisture fix is a temporary patch that will fail again within a few seasons.
guidance on identifying wood decay and moisture problems
Cost of Professional Exterior Trim Repair
The cost of professional exterior trim repair depends on the extent of the damage, the height of the trim, and whether the moisture source needs fixing too. A small patch on a ground-level windowsill is a very different job from replacing a rotted fascia board two stories up.
Pricing also varies by material and finish work. Because we don't publish fixed rates, the honest answer is that a free estimate is the only way to get an accurate number. Handyman Service Aurora provides free estimates and transparent pricing, so you know the scope before work begins.
Rotted trim rarely stays a small problem. Left alone, fungal decay spreads into the fascia board and siding, and the repair grows with it. Handyman Service Aurora handles the whole job: identifying the moisture source, carpentry and trim replacement, and exterior painting to match. We're licensed and insured, serve Aurora, Parker, Centennial, Foxfield, and the Denver Metro area, and provide free estimates. Call 720-989-4123 for a free estimate and get your trim repaired before the next storm finds it.
Frequently Asked Questions
How can I fix rotting exterior wood trim?
Start by finding and fixing the moisture source, then remove all soft, decayed wood with a chisel or flat-head screwdriver. Treat the exposed area with a wood hardener and fungicide. Mix epoxy resin and hardener, apply it to fill the void, then sculpt and sand once cured. Prime and paint with exterior-grade paint. If the rot has spread past about 30 percent of the trim's thickness or reached the structural framing, replacement is the better call.
What is the best outdoor wood filler for rotted wood?
Two-part epoxy resin is the strongest choice for exterior trim because it hardens like wood and resists moisture. For shallow surface repairs, a polyester wood filler works but can crack with seasonal movement. For deep voids, epoxy wins. Look for products labeled for exterior use and compatible with your primer and paint system. Avoid water-based fillers meant for interior use only.
How to repair rotting wood without replacing it outdoor?
You can repair without full replacement if the rot is contained to the surface and the wood still has structural integrity. Remove the soft material, apply wood hardener to firm up the surrounding fibers, fill with epoxy, then sand and paint. This works best on fascia board edges, window sills, and trim ends where moisture sits. If the wood crumbles when you press a screwdriver into it, replace that section instead.
When should you replace wood trim instead of repairing it?
Replace when the rot covers more than about a third of the trim's thickness, when the wood is soft through its full depth, or when fungal decay has reached the framing behind the trim. Also replace if the trim has warped, cracked, or pulled away from the wall. A repair that hides active rot will fail within a season. A professional can assess structural integrity and tell you which route makes sense.