 blog
Professional Interior Painting in Centennial: Costs & Timeline
Table of Contents
- What Professional Interior Painting in Centennial Includes
- How to Use an Interior Painting Cost Estimator
- Interior Painting Project Timeline: From Estimate to Final Walkthrough
- How to Prepare Walls for Professional Painting
- Eco-Friendly and Low-VOC Paint Options for Centennial Homes
- Why Hire Licensed and Insured Professional Painters in Centennial
- Conclusion
- Frequently Asked Questions
Last Updated: September 14, 2026
What Professional Interior Painting in Centennial Includes
Professional interior painting in Centennial is a full-service process that goes well beyond rolling color onto walls. It covers surface preparation, drywall repair, cabinet refinishing, trim work, and the final finish coats that hold up to daily life in a busy household. According to the U.S. Environmental Protection Agency's indoor air quality guidance, the prep and product choices made before the first coat matter as much as the paint itself.
At Handyman Service Aurora, we handle interior painting for homeowners across Centennial, Parker, Foxfield, and the wider Denver Metro area, and the pattern is consistent: projects that skip preparation come back within a year. Projects that invest in it last.
Here's what a complete interior painting scope actually covers:
- Surface preparation: filling nail holes, sanding, patching wall texture, and priming bare spots
- Drywall repair: fixing cracks, water stains, and popped seams before paint goes on
- Cabinet refinishing: sanding, deglossing, and recoating kitchen and bathroom cabinets
- Trim and molding: baseboard painting, door casings, crown molding, and window frames
- Ceiling painting: flat, even coverage that hides roller marks and old stains
Surface Preparation and Drywall Repair
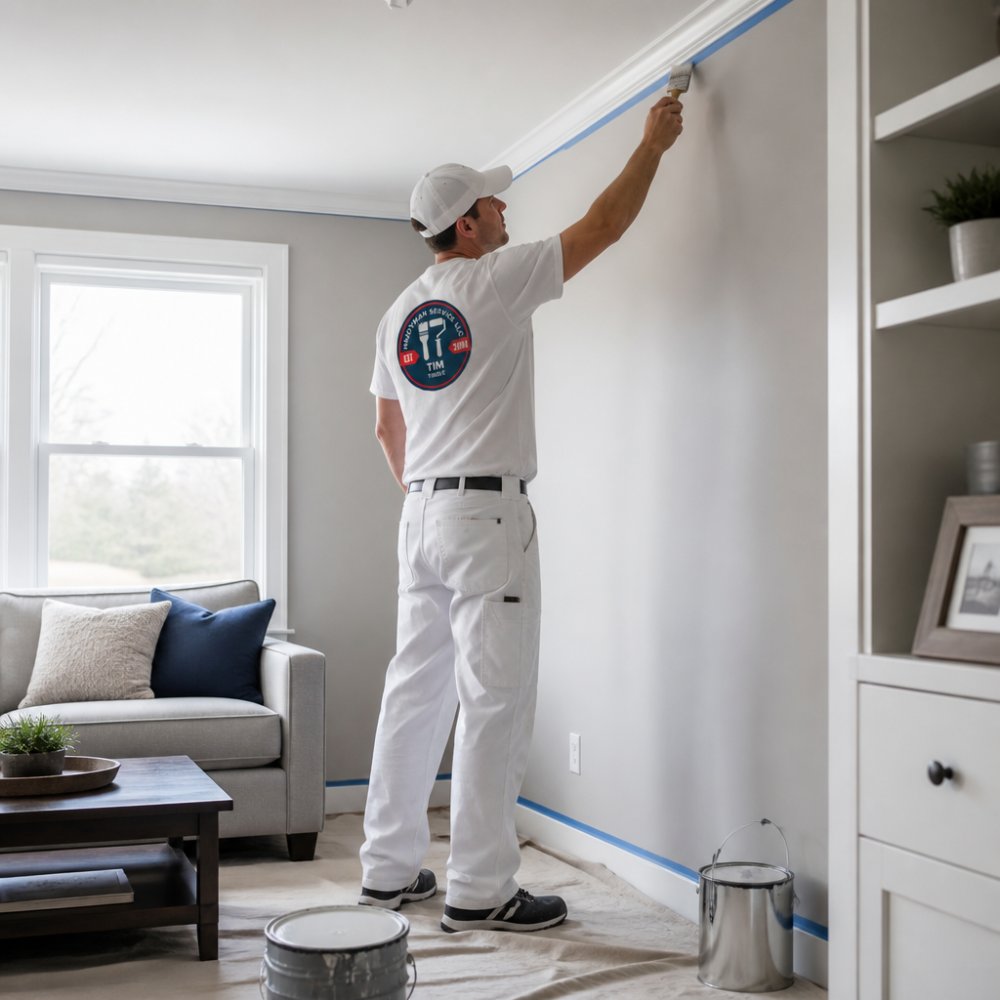
Preparation is where a paint job is won or lost. A common mistake is treating prep as a quick pass with a sanding block. In practice, it means scraping loose material, sealing stains with a stain-blocking primer, and matching wall texture so repairs disappear under the finish coat.
Drywall repair and wall texture repair are the two items homeowners most often underestimate. A hairline crack above a door frame usually signals movement, not just a cosmetic flaw, so patching without addressing the cause means it reappears.
Cabinet Refinishing and Trim Work
Cabinet refinishing delivers the biggest visual change per dollar of any interior painting task. Kitchen cabinets take the most abuse in a home, and a proper refinish involves degreasing, sanding, bonding primer, and a durable topcoat rather than a single coat of paint.
Trim and molding work is the detail that separates a professional result from a rushed one. Baseboard painting, door casings, and crown molding all need clean cut lines and a finish that resists scuffing. Modern color updates usually mean painting trim a shade brighter than the walls, which only works when the edges are sharp.
How to Use an Interior Painting Cost Estimator
An interior painting cost estimator gives you a ballpark before anyone sets foot in your home. It's a starting point, not a quote. Most estimators ask for square footage, ceiling height, number of rooms, and whether trim or ceilings are included, then apply a per-square-foot range that assumes average wall condition.
The problem is that "average condition" almost never describes a real house. Two rooms with identical square footage can land hundreds of dollars apart once you account for what's actually on the walls. Here's how the variables stack up, roughly in order of how much they move the number:
| Factor | Why It Moves the Number | Typical Impact |
|---|---|---|
| Wall and ceiling square footage | More area means more paint, more labor hours, and more masking | Largest single driver |
| Surface condition | Patching, texture matching, and stain blocking add prep labor before a brush touches the wall | Often the biggest swing between two similar bids |
| Ceiling height and access | Vaulted ceilings, stairwells, and tall foyers require ladders, scaffolding, or extension poles | Adds labor hours per room |
| Trim, doors, and windows | Cut work on casings, baseboards, and door slabs takes far longer per square foot than flat walls | Multiplies on older homes with lots of trim |
| Paint and primer grade | Premium coatings cost more per gallon but cover better and hold up longer | Moderate per-gallon difference, offset by fewer coats |
| Color change direction | Going from dark to light (or light to dark) usually needs an extra coat or a tinted primer | One additional coat across the whole area |
| Occupancy and furniture | Moving and protecting belongings adds setup and teardown time | Adds hours, not days, on most jobs |
| Cabinet refinishing | Degreasing, sanding, bonding primer, and a durable topcoat are a separate scope from wall painting | Priced per door and drawer front, not per square foot |
A few practical notes on using an estimator well:
- Estimators are directional, not binding. A calculator that returns a range is telling you what a typical job of that size costs, not what your job costs. The only number that matters is the one from a walkthrough.
- Ask what's excluded. Many online estimates assume walls only. Trim, ceilings, closets, and cabinet interiors are frequently add-ons. Knowing what's not included prevents bid shock.
- Compare bids on scope, not just totals. A lower bid that skips stain-blocking primer or texture matching isn't cheaper, it's a shorter job that fails sooner.
- Get the paint brand and sheen in writing. Product choice is one of the few line items you can compare apples-to-apples across bids.
Cost factors and budget planning come down to those variables, and the honest answer is that pricing depends on the scope, the condition of your walls, and the finish you choose. Handyman Service Aurora provides free estimates so you get a real number for your actual rooms rather than a generic range. For official guidance on paint product safety and labeling, the EPA's Safer Choice program is a useful reference.
Interior Painting Project Timeline: From Estimate to Final Walkthrough
An interior painting project timeline typically runs from a few days for a single room to a week or more for a full home repaint. The estimate and color consultation come first, then scheduling, prep, painting, and a final walkthrough.
Here's the sequence most projects follow:
- Free estimate and consultation: walkthrough, measurements, scope agreement
- Color selection and consultation: samples on your actual walls under your lighting
- Scheduling and material order: paint, primer, and supplies confirmed
- Surface preparation: masking, drop cloths, patching, sanding, priming
- Paint application: ceilings first, then walls, then trim and doors
- Final walkthrough: touch-ups, inspection, and sign-off
Project management matters more than most homeowners expect. A crew that communicates its schedule and shows up when it says it will is worth more than a slightly lower bid.
How to Prepare Walls for Professional Painting
Knowing how to prepare walls for professional painting helps you get a cleaner result and can reduce labor time. You don't need to do the work, but clearing the space and flagging problem areas speeds everything up.
Call 720-989-4123 for a free estimate →
A practical homeowner checklist:
- Remove wall art, shelves, and hardware; patch the holes or leave them for the crew
- Move furniture to the center of the room or out entirely
- Note any cracks, stains, or soft drywall and point them out during the estimate
- Clear countertops and cabinets if the kitchen is being painted
- Secure pets and plan for ventilation during application
- Confirm paint colors and finishes in writing before work begins
Surface preparation done right includes washing greasy kitchen walls, deglossing glossy finishes so paint bonds, and letting patched areas dry fully before priming. Rushing the dry time is a common mistake that shows up as flashing, where patches read as dull spots under the finish.
Eco-Friendly and Low-VOC Paint Options for Centennial Homes
Low-VOC paint options reduce the solvent smell and indoor air irritants that come with conventional coatings. VOC stands for volatile organic compounds, the chemicals that evaporate from paint as it dries. Low-VOC and zero-VOC formulas cut those emissions substantially.
For households with young children, asthma, or chemical sensitivity, this is often the deciding factor in product choice. The EPA's volatile organic compounds overview explains how these compounds affect indoor air and what labeling claims actually mean. Note that "low odor" and "low VOC" are not the same claim, so read the label rather than the marketing line.
Durable finishes and low-VOC formulas are no longer mutually exclusive. Modern waterborne alkyds and acrylic enamels hold up on trim and cabinets while keeping emissions down. If you're repainting a nursery or a bedroom, ask for the product data sheet before the order goes in.
Why Hire Licensed and Insured Professional Painters in Centennial
Hiring licensed and insured professional painters protects your home, your schedule, and your wallet. A licensed and insured provider carries liability coverage and workers' compensation, so an accident on your property doesn't become your problem.
The distinction matters more than most homeowners realize. General liability insurance covers damage to your home, a ladder through a window, overspray on furniture, a spilled gallon on hardwood. Workers' compensation covers the crew if someone is injured on your property. These are two separate policies, and a contractor can carry one without the other. A painter who is injured in your living room and has no workers' comp coverage may look to your homeowner's policy to cover medical costs.
Residential contractors operating without coverage leave homeowners exposed. If a painter falls off a ladder in your living room or damages a fixture, the claim lands on your homeowner's policy. Verifying licensing and insurance before work starts is the single fastest way to screen out side hustles.
Here's how to actually verify, rather than take someone's word for it:
- Ask for a certificate of insurance and confirm the effective dates cover your project window. A certificate that expired last month is not coverage.
- Call the insurer listed on the certificate to confirm the policy is active. Certificates can be altered; the insurer's records can't.
- Check that both general liability and workers' compensation appear on the certificate. If the crew is described as subcontractors, ask how they're covered.
- Confirm the business is registered to operate in your state and can provide a business license or registration number on request.
- Get the scope, price, and payment schedule in a written contract before any prep begins.
Beyond coverage, professional painters bring color matching, paint application techniques, and professional craftsmanship that DIY efforts rarely match. A flawless finish on trim and ceilings comes from experience with cut lines, back-rolling, and the right nap roller for each surface. That experience is also what lets a crew spot a soft spot in drywall or a stain that needs blocking before it becomes a callback.
Conclusion
Coordinating painting, drywall repair, and cabinet refinishing across multiple contractors is where most home improvement projects stall. Handyman Service Aurora handles all of it under one licensed and insured team, with free estimates and service across Centennial, Parker, Foxfield, Aurora, and the Denver Metro area. Call 720-989-4123 for a free estimate and get your interior painting project scheduled with a crew that shows up on time.
Frequently Asked Questions
What is the average cost to paint an interior room?
There is no single average because pricing depends on room size, ceiling height, wall condition, paint quality, and whether you need drywall repair. In the Centennial area, most professional interior painting quotes are itemized so you can see labor and materials separately. Handyman Service Aurora provides free estimates, and you can request a written quote by calling 720-989-4123. For a rough planning number, use an interior painting cost estimator and then confirm with a licensed and insured contractor.
How do I prepare my home for professional interior painters?
Clear small items from walls and shelves, remove or cover furniture in the center of each room, and take down curtains and hardware. Professional painters handle moving larger furniture, taping, and drop cloths as part of surface preparation. If you have pets, arrange for them to stay in a quiet area away from fumes and open windows. Emptying closets and kitchen cabinets ahead of time speeds up the interior painting project timeline and keeps the crew focused on prep and application.
What is the difference between flat, eggshell, and semi-gloss paint finishes?
Flat hides wall imperfections and works well for ceilings and low-traffic bedrooms. Eggshell has a slight sheen that resists moisture and cleaning, making it a common choice for living rooms and hallways. Semi-gloss is the most durable and easiest to wipe down, so it suits trim, molding, baseboards, doors, and kitchens or bathrooms. Professional painters match the finish to the room's use and the existing wall texture so the final coat looks consistent.
How long does professional interior painting take?
A single average room typically takes one to two days including prep, dry time, and two coats. A full home repaint can run five to ten working days depending on square footage, drywall repair, cabinet refinishing, and how many colors you choose. Weather affects dry time if windows stay open for ventilation. A detailed interior painting project timeline should be part of your written estimate so you know when each phase starts and finishes.