 how-to
Install Luxury Vinyl Plank Over Tile: A Step-by-Step Guide
Table of Contents
- Can You Install Luxury Vinyl Plank Over Existing Tile?
- Inspection Checklist: Is Your Tile Ready for LVP?
- How to Prepare Tile Floor for Vinyl Plank Installation
- Filling Grout Lines Before Vinyl Plank Installation
- LVP Installation Tools and Materials You'll Need
- Step-by-Step Installation Over Existing Tile
- Cost to Install LVP Over Tile: What to Expect
- Common Mistakes to Avoid
- Frequently Asked Questions
Last Updated: October 6, 2026
Can You Install Luxury Vinyl Plank Over Existing Tile?
Yes, you can install luxury vinyl plank over existing tile in many situations. The key is whether your tile is stable enough to serve as a foundation. If it's well-adhered, level, and free of major damage, LVP can go directly over it without removal, saving time and labor.
However, not every tile floor qualifies. Loose tiles, deep grout lines, moisture issues, and height differences can all cause problems, so inspect the surface carefully before installing luxury vinyl plank over tile.
When Installing Over Tile Works Best
Installing luxury vinyl plank over existing tile works well when the tile is structurally sound and the substrate is stable. Ceramic and porcelain tiles firmly bonded to concrete or plywood are ideal, and the tile acts as a protective layer against moisture from below.
This approach works best for:
- Bathrooms and kitchens with well-maintained tile floors
- Concrete slabs with no history of moisture problems
- Tile that has been down for several years without movement
- Situations where you want to avoid the mess and cost of tile removal
The main advantage is speed: skipping demolition means less dust, faster installation, and lower labor costs.
When You Should Remove Tile Instead
Some tile floors are poor candidates. If the tile is damaged, loose, or on an unstable substrate, remove it first.
Remove the tile if you encounter:
- Widespread loose or cracked tiles that move when you walk on them
- Significant moisture problems or water damage visible beneath tiles
- Grout lines deeper than 1/8 inch that create an uneven surface
- Tile installed over wood subfloors that show signs of rot or movement
- Floor height concerns where adding another layer would create transition problems
Removing tile takes more effort upfront but prevents future problems, a poor foundation will eventually cause your new flooring to fail.
Inspection Checklist: Is Your Tile Ready for LVP?
Before you install luxury vinyl plank over tile, inspect the existing floor thoroughly to determine whether the tile is suitable or removal is necessary.
Check for Loose, Cracked, or Damaged Tiles
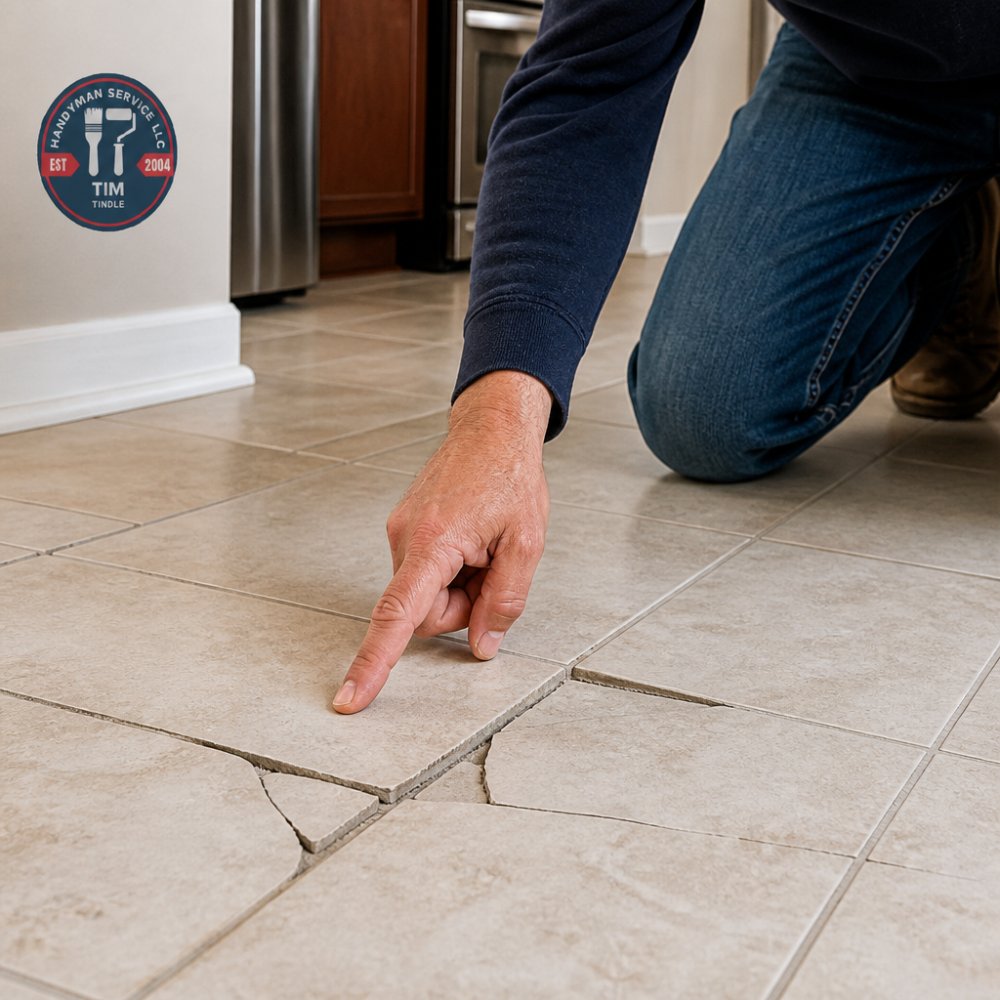
Walk the entire floor and listen for hollow sounds or movement, pressing down on each tile. Tiles should feel solid and immovable; if they shift, rock, or sound hollow, they aren't bonded properly to the subfloor.
Small hairline cracks are less concerning than widespread cracking. If more than 10% of your tile shows cracks or damage, the floor may be failing and removal is safer.
Check grout lines for gaps or missing grout. Crumbling grout or grout pulling away from tile edges means the floor is moving or settling unevenly, and that instability will transfer to your new LVP and cause premature wear.
Test Moisture and Vapor Control
Moisture is the biggest threat to LVP. Even though it's water-resistant on the surface, moisture rising from below can damage the core and warp or cup the planks.
Tape plastic sheeting to the tile for 24 hours. Condensation underneath means moisture is rising from the subfloor, a red flag. You may need a vapor barrier or tile removal and moisture remediation before installing LVP.
Consider the floor's history: has water ever pooled here, is there staining or discoloration, does the tile feel damp after rain or humid weather? These signs suggest moisture problems that will affect your new floor.
Measure Floor Levelness and Height Impact
Use a long straightedge or level across different areas. Gaps larger than 1/4 inch over 10 feet indicate an uneven floor that will cause problems.
Uneven tile creates high spots where LVP won't sit flush, and walking on them can cause planks to separate or click excessively.
Also measure height impact: tile plus LVP plus underlayment adds roughly 1/2 inch. At doorways with tight transitions to carpet or hardwood, that difference may be too noticeable or create a tripping hazard, so plan for transitions and baseboards that accommodate the new height.
How to Prepare Tile Floor for Vinyl Plank Installation
Once your tile is confirmed suitable for LVP, proper preparation is essential, a clean, smooth surface ensures the planks install correctly and perform well over time.
Clean and Degrease the Surface
Thoroughly clean the tile with a degreasing cleaner to remove buildup, dirt, or residue. Kitchen tile often has grease accumulation that prevents good adhesion if left in place.
Scrub with a stiff-bristled brush, especially grout lines and corners, then rinse with clean water and dry completely, a damp floor causes installation problems.
For stubborn stains, use a tile-specific cleaner or vinegar and water. Avoid oil-based cleaners, which leave a slippery residue.
Sand High Spots and Grout Ridges
Even if the floor feels flat, grout lines create ridges that telegraph through your new LVP, visible and uneven underfoot.
Use 120-grit sandpaper or a floor sander to knock down high spots and grout ridges. The goal isn't removing all grout but leveling the surface until grout lines are less pronounced and the tile is even.
Vacuum thoroughly after sanding, leftover dust interferes with underlayment adhesion and installation.
Filling Grout Lines Before Vinyl Plank Installation
Grout lines are one of the trickiest aspects of installing luxury vinyl plank over tile. If they're too deep, they'll create an uneven surface that causes problems.
Why Grout Line Depth Matters
Grout lines deeper than 1/8 inch create valleys your underlayment and LVP conform to as you walk, causing planks to flex and move. Over time this leads to visible seams, separation, and an uneven appearance.
Most LVP manufacturers require the floor to be within 1/4 inch of flatness over 10 feet, and deep grout lines can exceed that tolerance.
How to Fill Grout Joints Properly
Use a self-leveling patching compound or floor filler, which is thicker than grout and fills the lines completely.
Apply with a putty knife or margin trowel, pressing firmly into the grout lines and overfilling slightly, the compound shrinks as it dries, so filling a bit proud of the surface is correct.
Cure per the manufacturer's instructions, typically 24 hours, then sand high spots flush with 120-grit sandpaper for a smooth, even surface with no visible grout lines or valleys.
Call 720-989-4123 for a free estimate →
LVP Installation Tools and Materials You'll Need
Installing luxury vinyl plank over tile requires specific tools and materials, having everything on hand makes the process smoother and faster.
Essential tools include:
- Utility knife with fresh blades for cutting planks
- Tape measure for accurate measurements
- Miter saw or circular saw for crosscuts
- Spacers to maintain expansion gaps
- Tapping block and rubber mallet for seating planks
- Straightedge or level for checking flatness
- Vacuum for dust removal
- Knee pads for comfort during installation
Materials you'll need:
- Underlayment rated for use over tile
- Luxury vinyl planks in your chosen style
- Flooring adhesive if using glue-down installation
- Transition strips for doorways and room edges
- Baseboards or trim to cover the expansion gap
The underlayment is critical: it cushions, levels minor imperfections, and acts as a vapor barrier. Choose one specifically approved by your LVP manufacturer for installation over tile.
Step-by-Step Installation Over Existing Tile
Installation over tile follows the same basic steps as other substrates, with special attention to surface preparation.
Choose Floating or Click-Lock LVP
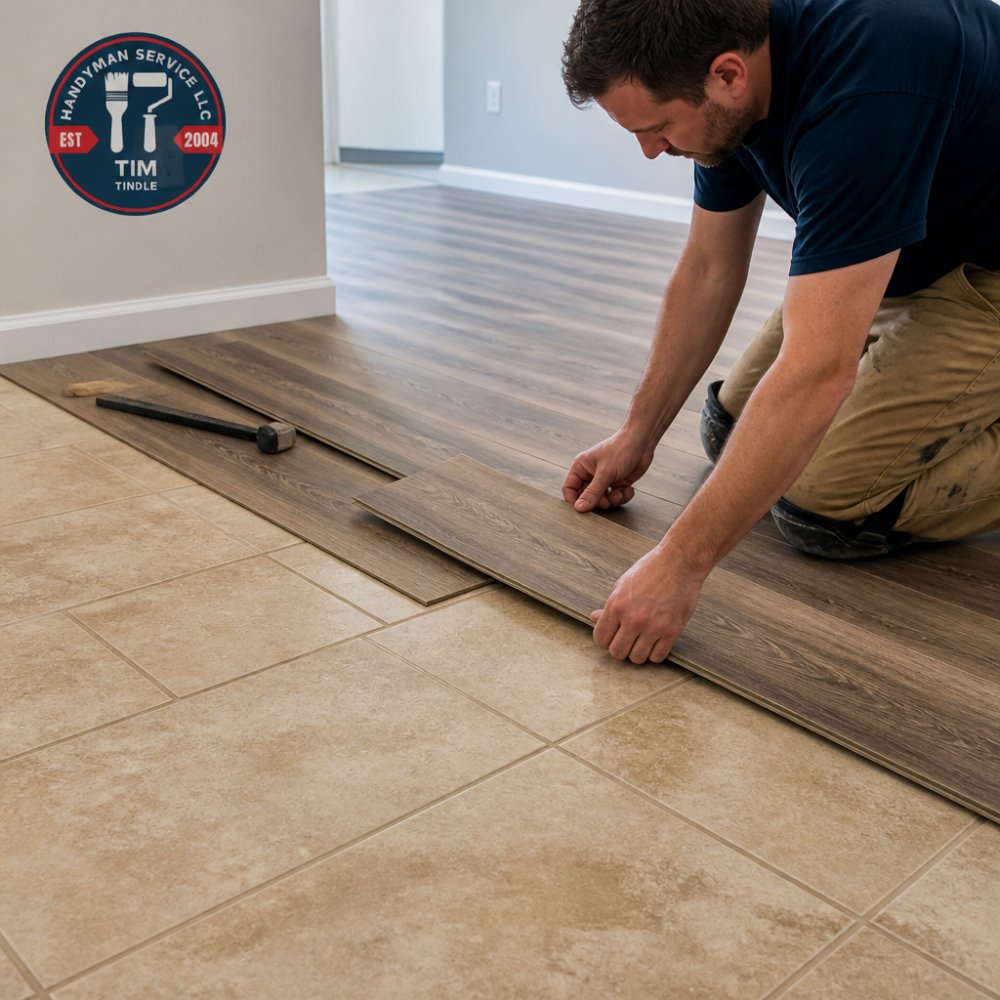
Most LVP over tile uses floating or click-lock systems, which lock together without glue and install faster and easier than glue-down methods.
Floating floors sit on the underlayment, held by their own weight and the locking system's friction, allowing slight movement as temperature and humidity change, important because tile and LVP expand at different rates.
Glue-down LVP is possible over tile but requires careful prep and the right adhesive; floating systems are generally preferred because they're more forgiving of minor imperfections.
Install Underlayment and Begin Laying Planks
Roll out the underlayment starting in one corner, cutting to fit, and tape the seams with underlayment tape to prevent shifting.
Begin laying planks in the corner opposite the main entry so the most visible area gets full-width planks rather than narrow slivers.
Leave a 1/4-inch expansion gap between planks and walls so the flooring can expand and contract without buckling.
Click each plank into the previous one, using a tapping block and rubber mallet to seat joints firmly. Work row by row, staggering end joints so they don't align in adjacent rows.
Handle Transitions and Baseboards
At doorways and transitions, install strips that bridge the height difference between your new LVP and adjacent flooring, protecting the edge and providing a smooth, safe surface.
Once flooring is complete, install baseboards or trim around the perimeter to cover the expansion gap, finish the room, and protect the LVP edge from damage.
Cost to Install LVP Over Tile: What to Expect
The cost to install luxury vinyl plank over tile depends on the space size, the existing tile's condition, and whether you hire professionals or DIY.
Labor and Material Cost Factors
Material costs include LVP planks, underlayment, adhesive if needed, transition strips, and baseboards. Premium products with realistic wood or stone finishes cost more than basic options.
Labor costs depend on complexity: a small, straightforward room costs less than a large, irregular space with many doorways and transitions, and significant prep, grout filling, or repairs increase labor costs.
The existing tile's condition affects pricing: a well-maintained floor needing minimal prep is faster and cheaper, while damaged tile needing repair or removal adds time and expense.
DIY vs. Professional Installation
DIY saves labor costs but requires time, skill, and proper tools. If you have flooring experience it's feasible; if not, mistakes can be costly.
Professional installation from Handyman Service Aurora ensures the job is done correctly. Our licensed, insured team handles all aspects of the installation, from inspection and prep through final trim and transitions. We provide a free estimate so you know the cost upfront.
Whether you choose DIY or professional installation, surface preparation quality determines success, cutting corners leads to problems later.
Common Mistakes to Avoid
Several common mistakes can compromise your luxury vinyl plank installation over tile.
Ignoring moisture issues is another major mistake.
Installing without proper underlayment, or the wrong type, reduces your floor's lifespan, quality underlayment pays off in performance and durability.
Not allowing expansion gaps is a common DIY error.
Using the wrong transition strips, or skipping them, creates safety hazards and an unfinished look.
Failing to stagger end joints creates weak points. Offset end joints by at least 6 inches between adjacent rows to distribute stress evenly.
Frequently Asked Questions
Do you need to fill grout lines before installing LVP over tile?
Yes, filling grout lines is essential. Grout joints deeper than 1/8 inch can cause the LVP to flex or crack under foot traffic. Use a patching compound or self-leveling underlayment to fill grout lines flush with the tile surface before installation. Check your LVP manufacturer's specifications for maximum grout depth limits, as some products have stricter requirements. Proper filling creates a stable substrate for your new flooring.
Can you install luxury vinyl plank over loose or cracked tiles?
No. Loose, cracked, or damaged tiles must be repaired or replaced before installing LVP. A weak substrate will cause the vinyl planks to move, flex, or sound hollow underfoot. Replace loose tiles, fill cracks with epoxy or patching compound, and ensure all tiles are firmly adhered to the subfloor. An unstable foundation compromises both the appearance and durability of your new flooring.
What happens to floor height when you install LVP over tile?
Installing LVP over tile raises your floor height by roughly 1/4 to 1/2 inch, depending on underlayment thickness. This can affect door clearance, transitions to adjacent rooms, and baseboard installation. Measure your doorway clearance before starting and plan for transition strips at thresholds. In some cases, you may need to trim doors or adjust thresholds to accommodate the new floor height.
Do you need underlayment when installing LVP over existing tile?
Yes, underlayment is highly recommended. It cushions the LVP, reduces sound transmission, and helps level minor surface irregularities in the tile. Some underlayments also provide moisture and vapor barriers, which is especially important in kitchens and bathrooms. Choose an underlayment rated for use over ceramic or porcelain tile, and follow your LVP manufacturer's specifications for compatibility and installation method.