 how-to
Preventing Crown Molding Gaps: Install It Right the First Time
Last Updated: November 2, 2026
Quick Summary
Crown molding gaps usually come from the molding, wall, ceiling, or fasteners moving, or from a joint never built to handle that movement. Preventing them starts with preparation: check walls for flatness, let the trim acclimate, and fasten into framing or blocking rather than drywall alone.
- Check walls and ceilings with a long level and mark high or low spots before installing.
- Let molding sit in the room at least 48 hours to match temperature and humidity.
- Fasten into ceiling joists and wall top plates, not drywall alone.
- Drive fasteners every 12 to 16 inches, with extra support within 6 inches of joints.
- Use flexible caulk for joints that move with the seasons, not rigid filler.
Table of Contents
- Why Crown Molding Pulls Away From the Ceiling and Wall
- Prepare the Walls, Ceiling, and Molding Before You Install
- Fasten Crown Molding Into Framing and Blocking
- Handle Seasonal Movement and Humidity During and After Installation
- Choose the Best Caulk for Crown Molding Gaps
- How to Fill Gaps in Crown Molding Corners
- How to Fill a Large Gap Between Crown Molding and Ceiling
- Booking a Crown Molding Inspection or Install With Handyman Service Aurora
- Frequently Asked Questions
Why Crown Molding Pulls Away From the Ceiling and Wall
Crown molding gaps are one of the most common complaints homeowners have after a new install. For a dedicated walkthrough of the repair itself, see step-by-step crown molding gap fixes.
Crown molding is a decorative trim piece set at an angle where a wall meets a ceiling, and it must hold its position through temperature swings, house settling, and humidity changes.
Most gaps come from a few predictable sources:
- Wall and ceiling surfaces that are not flat or square
- Wood that shrinks or expands as the air dries out or gets humid
- Fasteners that miss the framing and hold only drywall
Knowing the cause matters before you pick a fix.
Prepare the Walls, Ceiling, and Molding Before You Install
Preparation decides most of the outcome. Skipping it is the fastest way to end up with crown molding gaps you have to fill later.
Start by checking the walls and ceiling with a long level or straightedge. To pick the right blades and saws before you start, see the best tools for cutting crown molding in tight corners.
Next, inspect the molding itself:
- Lay each piece flat and check for warping or twisting.
- Let the trim sit in the room for at least 48 hours so it matches the room's temperature and humidity.
- Dry-fit each joint before you apply any adhesive.
Finally, decide where the nails will go. Mark the stud or blocking locations on the ceiling and the top plate on the wall before you start cutting.
Fasten Crown Molding Into Framing and Blocking
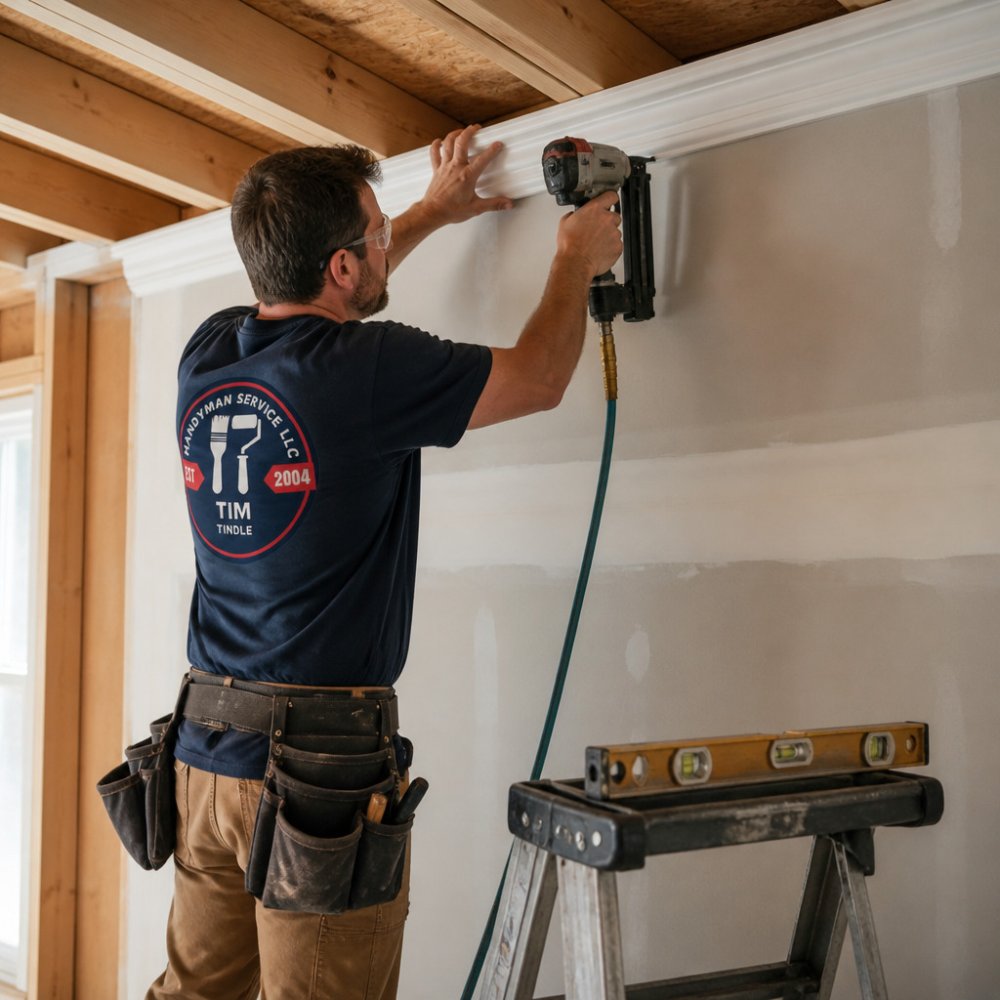
Fasteners are where many installs go wrong. Crown molding is heavy for its size, and drywall alone cannot hold it long term. The fix is not just "nail more", it is matching the fastener and the anchor to the substrate behind the trim.
Locate framing before you cut
Mark ceiling joists and wall top plates on the surface before any molding goes up. A stud finder works on standard drywall, but it can miss on plaster-and-lath walls, where the lath confuses magnetic and electronic sensors. On plaster, tap-test or use a deep-scan setting, and confirm each mark with a thin nail. If the ceiling is furred down or has a soffit, the joists may sit several inches above the drywall face, measure the gap and choose fastener length accordingly.
Match the fastener to the substrate
- Drywall over wood framing: Use finish nails long enough to bite at least 1 inch into solid wood. A 2-1/2 inch 15- or 16-gauge finish nail is a common choice for 5/8-inch drywall over framing.
- Plaster and lath: Plaster is brittle and cracks under impact. Predrill pilot holes and use screws rather than nails where possible; a trim-head screw holds better and can be backed out if the molding shifts.
- Masonry or concrete ceilings: Standard nails will not hold. Use masonry screws or a powder-actuated fastener rated for the substrate, and follow the manufacturer's embedment depth.
Add blocking where framing is missing
If the wall has no solid backing where the molding sits, add blocking first. Blocking is a short piece of lumber fastened between framing members, and it gives the molding something solid to hold. Cut blocking to fit snugly, fasten it with structural screws, and mark its location on the wall so you can hit it with finish nails later.
Space and set fasteners correctly
Drive fasteners every 12 to 16 inches along the length, with extra support within 6 inches of each joint and at outside corners. Alternate the nail angle, one nail angled slightly up into the ceiling framing, the next angled slightly down into the wall plate, so the molding is pulled tight in both directions. Set nails just below the surface with a nail set, then fill the holes after the trim is secure.
Watch out: nailing only into drywall is a common reason crown molding can pull away over time, and on plaster, driving a nail without a pilot hole can crack the wall above the trim.
Material matters for fastening
Wood molding expands and contracts with humidity, so leave a small gap at inside corners and avoid over-driving nails that would restrict movement. MDF moves less with humidity but splits easily near edges, predrill and keep fasteners back from the ends. PVC and flexible molding are lighter and more forgiving, but they need fasteners that will not crush the profile; use trim-head screws with washers or the manufacturer's recommended adhesive-and-fastener system.
Handle Seasonal Movement and Humidity During and After Installation
Wood moves. It takes on moisture when the air is humid and gives it up when the air is dry, which is a major reason crown molding gaps open up. Indoor humidity can drop sharply in winter, and that movement can be noticeable.
To manage it:
Call 720-989-4123 for a free estimate →
- Install when the home is at its normal living temperature and humidity, not during a heat wave or a dry cold snap
- Keep the house at steady conditions for the first few weeks
- Use a small humidifier in winter if the air becomes very dry
Plan for movement by using flexible caulk at the joint instead of rigid filler. A flexible bead can stretch and compress with the wood, while a rigid one cracks.
Choose the Best Caulk for Crown Molding Gaps
Not all caulk behaves the same way, and the right choice depends on the size of the gap, whether the joint moves, and what the molding is made of. Choosing the wrong product can cause repairs to crack again within a season.
Diagnose the gap before you buy
Before reaching for a tube, decide what kind of gap you have:
- A tight, stable gap under about 1/8 inch at a joint that does not move: a paintable acrylic latex caulk is usually enough.
- A gap that opens and closes with the seasons: you need a flexible, elastomeric caulk that can stretch and compress.
- A gap wider than about 1/4 inch: caulk alone will sag or crack. Plan on backer rod or a lightweight filler first.
- A gap caused by loose molding: fix the fastening before you fill anything. Caulk over a moving board will fail.
A simple test: press on the molding near the gap. If it moves, the problem is fastening, not the filler. If it is solid and the gap changes with the weather, the problem is movement.
Match the caulk to the job
- Paintable acrylic latex: The default for interior trim. It tools easily, takes paint, and cleans up with water. Choose a low-shrink formula so the bead does not pull away as it cures.
- Elastomeric or siliconized acrylic: Better stretch for joints that see seasonal movement. Check that it is labeled paintable, some elastomerics are not, and paint will bead up on them.
- 100% silicone: Excellent flexibility and water resistance, but it is not paintable and will not accept a finish coat. Reserve it for areas that stay unpainted or for exterior-adjacent conditions.
- Polyurethane caulk: Very durable and paintable, but slower to cure and harder to tool. A reasonable choice for large or high-movement joints where a longer working time is acceptable.
Material-specific behavior
Wood molding moves with humidity, so a flexible caulk at the joint is the safer choice. MDF is more dimensionally stable but its cut edges are thirsty and can swell if flooded with water-based caulk, apply a thin bead and avoid over-wetting during tooling. PVC and flexible molding move very little, so a standard paintable acrylic is usually sufficient, but check the manufacturer's guidance because some PVC trim requires a specific adhesive or caulk chemistry to bond properly.
What to check on the label
- Paintability: The caulk should take paint without flaking or beading.
- Flexibility: Look for "flexible" or "elastomeric" on the label for moving joints.
- Shrinkage: Low-shrink formulas leave a cleaner line after curing.
- Dry time and recoat time: Plan the paint job around the label, not around guesswork.
Caulk is for narrow gaps. Wide gaps need a different approach, covered below. And if the gap keeps returning after a proper caulk repair, the cause is almost always movement or a loose fastener, not the caulk itself.
The right caulk depends on the gap size, whether the joint moves, and the molding material. Here is how the main options compare.
| Caulk type | Best for | Key difference |
|---|---|---|
| Paintable acrylic latex | Tight, stable gaps under about 1/8 inch | Tools easily, takes paint, cleans up with water |
| Elastomeric or siliconized acrylic | Joints that open and close with the seasons | Stretches and compresses; confirm it is paintable |
| 100% silicone | Unpainted areas and high water exposure | Very flexible but not paintable |
| Polyurethane caulk | Large or high-movement joints | Durable and paintable but slower to cure and tool |
How to Fill Gaps in Crown Molding Corners
Corners are where crown molding gaps show most, so take extra care here.
- Clean the joint so it is free of dust and loose paint.
- Apply a thin, even bead of flexible caulk along the gap.
- Wet a finger or a damp sponge and smooth the bead right away.
- Wipe away excess before it skins over.
- Let it dry fully, then prime and paint.
Quick answer: For a small corner gap under about 1/8 inch, a flexible acrylic caulk bead, smoothed while wet and painted after it dries, is usually enough.
How to Fill a Large Gap Between Crown Molding and Ceiling
A gap wider than about 1/4 inch will not hold a caulk bead well. Caulk can crack or sag when it has to fill too much space.
For larger gaps, use backer rod or a lightweight filler first.
If the gap is large because the molding was never fastened into framing, fix the fastening first.
A large gap can be a sign of a bigger problem. When in doubt, have a professional look at it before you repair it.
Booking a Crown Molding Inspection or Install With Handyman Service Aurora
If you have crown molding gaps that keep returning, or you are planning a new install and want it done right, a professional inspection can find the cause quickly. Handyman Service Aurora is licensed and insured and offers free estimates across Aurora, Foxfield, Parker, Centennial, and the Denver Metro area.
To get started, call 720-989-4123 for a free estimate. Describe the gap, the room, and whether the trim is already installed or still being planned, so the team can prepare the right solution.
Frequently Asked Questions
How do you seal gaps in crown molding?
Clean the joint, then run a bead of paintable acrylic latex caulk along the gap, slightly overfilling it. Smooth the bead with a damp finger or a putty knife, wipe away excess, and let it cure fully before painting. For gaps wider than about a quarter inch, press in foam backer rod first so the caulk bridges the opening rather than sagging into it. Expect some shrinkage, so a second thin pass is often needed. Caulk is the standard approach for hairline to moderate gaps, while larger gaps usually need filler or a fix to the attachment.
Why does crown molding separate from the ceiling?
The most common causes are fasteners that miss framing, a ceiling or wall that is not flat, and wood moving with changes in humidity. Molding nailed only into drywall will pull away as the drywall flexes. Installing into ceiling joists or blocking, rather than relying on drywall alone, greatly reduces movement. Seasonal swings in indoor humidity can also cause the wood to expand and contract, which opens joints over time, especially in homes with dry winter air.
Can seasonal changes cause gaps in crown molding?
Yes. Wood expands when humid and shrinks when dry, and indoor humidity can drop enough in winter to open joints. Acclimating molding to the room for several days before installation, keeping indoor humidity moderate, and using flexible caulk on joints all help. Gaps that appear only in winter and close in summer usually point to humidity rather than a failed installation.