 how-to
Should You Hire a Pro for a Ceiling Leak Repair?
Quick Summary
Hire a professional for a ceiling leak repair when the water source is unclear, the drywall or insulation is damaged, or mold may be present. A quick patch can hide the problem while the real damage keeps spreading behind the surface.
- A stain that keeps spreading or returns after drying signals water is still getting in.
- Plumbing leaks tend to appear after fixtures are used, while roof leaks show up during or after rain.
- Materials that stay wet for more than two days may have mold even when you cannot see it.
- Cosmetic-only ceiling stain repair costs $150-$400, assuming the leak source is already fixed.
- Document the stain and damage with dated photos before repairs begin to support any insurance claim.
Table of Contents
- Should You Hire a Pro for a Ceiling Leak Repair?
- Signs a Ceiling Leak Needs a Professional
- How to Find the Source of a Ceiling Leak
- Temporary Fix for a Leaking Ceiling Before the Pro Arrives
- What a Ceiling Leak Repair Typically Costs
- How to Vet a Ceiling Leak Repair Contractor
- Booking Your Free Estimate in Aurora and Denver Metro
- Frequently Asked Questions
Should You Hire a Pro for a Ceiling Leak Repair?
Last Updated: November 9, 2026
A ceiling stain that keeps spreading is not a problem you can wait out. Handyman Service Aurora sees homeowners in Aurora and the Denver Metro area face this decision every spring and fall, when storms push water into attics and upper rooms. The gap is wide, and the right call depends on where the water is actually coming from.
Hiring a professional for a ceiling leak repair is the right move when the source is unclear, when the damage has reached the drywall or insulation, or when mold could be involved. A quick patch can hide the problem for a few weeks while the real damage keeps growing behind the surface.
Signs a Ceiling Leak Needs a Professional
Some leaks are a simple fix. Others are a warning that water has traveled far from where you see it. Call a professional if the stain is growing, the drywall feels soft or sags, the paint bubbles, or you notice a musty smell. Any of these suggests moisture is still getting in.
A stain that returns after you have dried it is another red flag. So is water staining on more than one ceiling area, which often means the leak has moved along framing or ductwork.
Plumbing leak or roof leak? Why the source matters
The source determines the repair, and it determines who you need. A plumbing leak usually shows up after a shower, a toilet, or a supply line is used, and the stain tends to appear beneath a bathroom or kitchen. A roof leak tends to show up during or right after rain, often in a line that follows the roof slope.
If a plumber cannot find an active plumbing leak, the water is probably coming from the roof or the structure above. In that case you may need a roofer or a general contractor instead of a plumber. Pointing the wrong trade at the problem wastes time and money.
How to Find the Source of a Ceiling Leak
Start by checking the most likely points of entry. Look for active drips during rain, and note which way the stain has spread. Water runs along joists and pipes before it shows up on the ceiling, so the stain often sits some distance from the real leak.
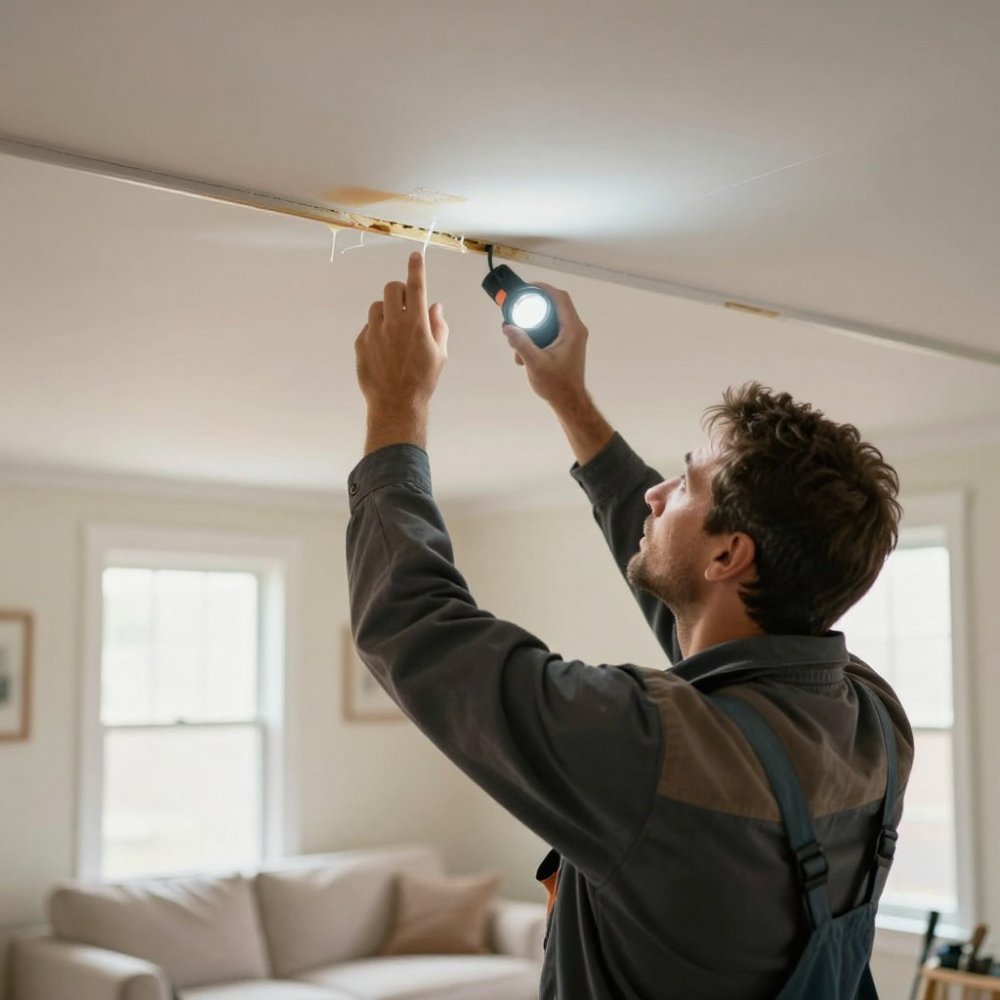
Check the room directly above, if you can access it. Look for wet insulation, damp framing, and signs of rust or mineral deposits on pipes. Shut off nearby fixtures and see whether the drip stops. If it does, the plumbing is the likely cause. If it keeps going, focus on the roof and flashing.
Temporary Fix for a Leaking Ceiling Before the Pro Arrives
If water is actively dripping, the first priority is limiting damage, not making the ceiling look right. Place a bucket or tarp under the drip, move furniture and electronics out of the way, and use a towel to direct the water into the container. Turn off power to nearby light fixtures if water is reaching them.
Do not try to dry the ceiling by poking holes in it unless you know what is above. A controlled opening can help water drain, but a blind hole can send it into wall cavities. Drying materials quickly matters.
Once the leak is stopped and the area is dry, stain removal is a separate task. Our guide on the best way to remove water stains from ceiling drywall covers that step after the source has been handled.
What a Ceiling Leak Repair Typically Costs
Costs depend on how much material is damaged and whether the source has to be fixed first.
To give you a clearer picture, here is how costs break down by damage level:
- Cosmetic only (stain, no active leak): $150-$400 for cleaning, sealing, and repainting. This assumes the leak source is already fixed.
- Minor drywall damage (soft spot, small sag): $300-$1,200. Includes cutting out damaged drywall, patching, texture matching, and painting.
- Moderate damage (insulation wet, joist staining): $1,200-$3,000. Requires removing wet insulation, drying framing, and possibly replacing a section of drywall.
- Structural involvement (decking, rafters): $3,000-$6,000+. Often requires a roofer or general contractor to repair framing before ceiling work begins.
Your final price depends on the size of the affected area, the materials involved, and how far the damage has spread. Ask any contractor to itemize the work so you can see what you are paying for. A written estimate should separate diagnosis, source repair, drywall, texture, and paint.
Get the scope in writing before you approve any work.
Drywall, texture, and paint matching
Patching drywall is the easy part. Matching the existing texture and paint is where many repairs look unfinished. Popcorn ceiling texture is especially hard to blend, and older paint may not match new coats exactly. Our drywall repair guide for Foxfield explains what the repair process involves from start to finish.
Plan for primer, skim coat work, and full repainting of the affected section, not just a spot. Our interior painting cost guide for Aurora breaks down what painting this kind of repair typically involves.
Mold remediation and insurance documentation
If materials stayed wet for more than two days, mold may be present even when you cannot see it. Do not skip this if the area shows dark spotting or a persistent odor.
If you plan to file an insurance claim, document everything before repairs begin. Take dated photos and video of the stain, the damaged materials, and the source. Keep receipts for emergency mitigation. Insurers often ask for this evidence, and missing records can complicate a claim. A common pattern is for adjusters to deny or reduce claims when the homeowner cannot show the pre-repair condition. Store photos in the cloud and keep a written log of dates and conversations with your insurer.
The article breaks down likely costs by damage level:
| Damage level | Typical cost | What it includes |
|---|---|---|
| Cosmetic only (stain, no active leak) | $150-$400 | Cleaning, sealing, repainting |
| Minor drywall damage (soft spot, small sag) | $300-$1,200 | Cutting out drywall, patching, texture, paint |
| Moderate damage (insulation wet, joist staining) | $1,200-$3,000 | Removing insulation, drying framing, possible drywall replacement |
| Structural involvement (decking, rafters) | $3,000-$6,000+ | Framing repair, often by a roofer or general contractor |
How to Vet a Ceiling Leak Repair Contractor
Ask for proof of licensing and liability insurance before work starts. Request a written estimate with line items for diagnosis, the source repair, drywall, texture, and paint.
Beyond the basics, use these criteria to separate qualified contractors from risky ones:
- License and insurance verification: Ask for the license number and verify it with your state or local licensing board. Request a certificate of insurance showing both general liability and workers' compensation coverage. If a contractor cannot provide these, walk away.
- Scope of work: The estimate should separate the source repair (plumbing or roofing) from the ceiling repair. If the contractor is not licensed for the source trade, they should say so and coordinate with a licensed plumber or roofer.
- Payment schedule: Never pay the full amount upfront. Be cautious of anyone demanding cash or full payment before work begins.
Be cautious of anyone who quotes a low figure and then adds "extra issues" once they are on site. Ask how additional costs will be approved. A clear scope protects you from surprise invoices.
Watch out: do not let a contractor begin tearing out ceilings before the source is confirmed. Opening the wrong area adds cost and leaves the real leak active. If a contractor suggests opening the ceiling without first inspecting the attic or using a moisture meter, that is a red flag.
Finally, check reviews on multiple platforms and ask for references from similar jobs.
Booking Your Free Estimate in Aurora and Denver Metro
Handyman Service Aurora offers free estimates for ceiling and drywall repairs across Aurora, Foxfield, Parker, Centennial, and the wider Denver Metro area. The estimate lets you see the scope of work and the likely price before you commit. If you need a broader look at the project, the handyman services page lists the licensed and insured work we handle in this area.
If the leak may be coming from a fixture or supply line rather than the roof, our plumbing service page explains which plumbing problems we take on. The service covers the diagnosis and the repair, so you do not have to coordinate separate trades.
Call 720-989-4123 for a free estimate. We will review what you are seeing and discuss your options before any work begins.
Frequently Asked Questions
What should I do before a professional arrives to repair a ceiling leak?
Place a bucket or tarp under the drip and move furniture and rugs out of the area. Turn off power to any light fixtures or fans in the affected room if water is reaching them. Take dated photos and video of the stains, sagging, and any water pooling, since these are the records an insurance adjuster will ask for. Avoid poking the ceiling to test it, because that can make the damage worse. Note when the leak is worse, such as during rain or when showers run, because that helps the technician trace the source.
How much does professional ceiling leak repair cost?
Final pricing depends on the size of the affected area, the cause, and access. Ask for a written estimate that separates leak diagnosis from drywall and finishing work.
Will homeowners insurance cover ceiling leak damage?
Many homeowners policies cover sudden, accidental water damage, such as a pipe that bursts, but often exclude gradual leaks, lack of maintenance, and damage from flood or groundwater. Coverage depends on your specific policy, so check with your insurer before work begins. Document the damage with photos, keep receipts for emergency mitigation, and save the contractor's written estimate. Share that documentation with your adjuster, and do not authorize large repairs before the claim is reviewed unless the insurer approves them.
What questions should I ask a ceiling leak repair contractor?
Ask whether they will identify and fix the source of the leak, not just patch the ceiling. Confirm they carry general liability insurance and workers' compensation, and ask for proof. Request a written estimate with a breakdown of diagnosis, drywall replacement, texture and paint matching, and any mold or moisture testing. Ask how long the job will take, whether they offer a warranty on the repair, and whether they will help document the damage for an insurance claim.